Docker部署配置nginx反向代理、负载均衡(权重轮询)
一、Nginx配置文件解读
Nginx配置文件分为3大块,分别是全局配置、Events块、Http块。
全局配置,主要是一些关于用户及组的配置。
Events块,主要配置nginx服务器与用户网络的连接。
Http块,nginx配置最重要的部分,http块包含了代理,缓存,日志定义等。配置服务器反向代理,负载均衡都在http块进行配置。
#======全局配置======= #user nobody; worker_processes 1; #error_log logs/error.log; #error_log logs/error.log notice; #error_log logs/error.log info; #pid logs/nginx.pid; #======events块======= events { worker_connections 1024; } #======http块======= http { include mime.types; default_type application/octet-stream; #log_format main '$remote_addr - $remote_user [$time_local] "$request" ' # '$status $body_bytes_sent "$http_referer" ' # '"$http_user_agent" "$http_x_forwarded_for"'; #access_log logs/access.log main; sendfile on; #tcp_nopush on; #keepalive_timeout 0; keepalive_timeout 65; #gzip on; server { listen 80; server_name localhost; #charset koi8-r; #access_log logs/host.access.log main; location / { root html; index index.html index.htm; } #error_page 404 /404.html; # redirect server error pages to the static page /50x.html # error_page 500 502 503 504 /50x.html; location = /50x.html { root html; } # proxy the PHP scripts to Apache listening on 127.0.0.1:80 # #location ~ \.php$ { # proxy_pass http://127.0.0.1; #} # pass the PHP scripts to FastCGI server listening on 127.0.0.1:9000 # #location ~ \.php$ { # root html; # fastcgi_pass 127.0.0.1:9000; # fastcgi_index index.php; # fastcgi_param SCRIPT_FILENAME /scripts$fastcgi_script_name; # include fastcgi_params; #} # deny access to .htaccess files, if Apache's document root # concurs with nginx's one # #location ~ /\.ht { # deny all; #} } # another virtual host using mix of IP-, name-, and port-based configuration # #server { # listen 8000; # listen somename:8080; # server_name somename alias another.alias; # location / { # root html; # index index.html index.htm; # } #} # HTTPS server # #server { # listen 443 ssl; # server_name localhost; # ssl_certificate cert.pem; # ssl_certificate_key cert.key; # ssl_session_cache shared:SSL:1m; # ssl_session_timeout 5m; # ssl_ciphers HIGH:!aNULL:!MD5; # ssl_prefer_server_ciphers on; # location / { # root html; # index index.html index.htm; # } #} }#======全局配置======= #user nobody; worker_processes 1; #error_log logs/error.log; #error_log logs/error.log notice; #error_log logs/error.log info; #pid logs/nginx.pid; #======events块======= events { worker_connections 1024; } #======http块======= http { include mime.types; default_type application/octet-stream; #log_format main '$remote_addr - $remote_user [$time_local] "$request" ' # '$status $body_bytes_sent "$http_referer" ' # '"$http_user_agent" "$http_x_forwarded_for"'; #access_log logs/access.log main; sendfile on; #tcp_nopush on; #keepalive_timeout 0; keepalive_timeout 65; #gzip on; server { listen 80; server_name localhost; #charset koi8-r; #access_log logs/host.access.log main; location / { root html; index index.html index.htm; } #error_page 404 /404.html; # redirect server error pages to the static page /50x.html # error_page 500 502 503 504 /50x.html; location = /50x.html { root html; } # proxy the PHP scripts to Apache listening on 127.0.0.1:80 # #location ~ \.php$ { # proxy_pass http://127.0.0.1; #} # pass the PHP scripts to FastCGI server listening on 127.0.0.1:9000 # #location ~ \.php$ { # root html; # fastcgi_pass 127.0.0.1:9000; # fastcgi_index index.php; # fastcgi_param SCRIPT_FILENAME /scripts$fastcgi_script_name; # include fastcgi_params; #} # deny access to .htaccess files, if Apache's document root # concurs with nginx's one # #location ~ /\.ht { # deny all; #} } # another virtual host using mix of IP-, name-, and port-based configuration # #server { # listen 8000; # listen somename:8080; # server_name somename alias another.alias; # location / { # root html; # index index.html index.htm; # } #} # HTTPS server # #server { # listen 443 ssl; # server_name localhost; # ssl_certificate cert.pem; # ssl_certificate_key cert.key; # ssl_session_cache shared:SSL:1m; # ssl_session_timeout 5m; # ssl_ciphers HIGH:!aNULL:!MD5; # ssl_prefer_server_ciphers on; # location / { # root html; # index index.html index.htm; # } #} }#======全局配置======= #user nobody; worker_processes 1; #error_log logs/error.log; #error_log logs/error.log notice; #error_log logs/error.log info; #pid logs/nginx.pid; #======events块======= events { worker_connections 1024; } #======http块======= http { include mime.types; default_type application/octet-stream; #log_format main '$remote_addr - $remote_user [$time_local] "$request" ' # '$status $body_bytes_sent "$http_referer" ' # '"$http_user_agent" "$http_x_forwarded_for"'; #access_log logs/access.log main; sendfile on; #tcp_nopush on; #keepalive_timeout 0; keepalive_timeout 65; #gzip on; server { listen 80; server_name localhost; #charset koi8-r; #access_log logs/host.access.log main; location / { root html; index index.html index.htm; } #error_page 404 /404.html; # redirect server error pages to the static page /50x.html # error_page 500 502 503 504 /50x.html; location = /50x.html { root html; } # proxy the PHP scripts to Apache listening on 127.0.0.1:80 # #location ~ \.php$ { # proxy_pass http://127.0.0.1; #} # pass the PHP scripts to FastCGI server listening on 127.0.0.1:9000 # #location ~ \.php$ { # root html; # fastcgi_pass 127.0.0.1:9000; # fastcgi_index index.php; # fastcgi_param SCRIPT_FILENAME /scripts$fastcgi_script_name; # include fastcgi_params; #} # deny access to .htaccess files, if Apache's document root # concurs with nginx's one # #location ~ /\.ht { # deny all; #} } # another virtual host using mix of IP-, name-, and port-based configuration # #server { # listen 8000; # listen somename:8080; # server_name somename alias another.alias; # location / { # root html; # index index.html index.htm; # } #} # HTTPS server # #server { # listen 443 ssl; # server_name localhost; # ssl_certificate cert.pem; # ssl_certificate_key cert.key; # ssl_session_cache shared:SSL:1m; # ssl_session_timeout 5m; # ssl_ciphers HIGH:!aNULL:!MD5; # ssl_prefer_server_ciphers on; # location / { # root html; # index index.html index.htm; # } #} }
二、实验环境配置
1、拉取nginx及tomcat镜像
#nginx后不加版本标签的话,默认拉取的版本是最新版本 docker pull nginx docker pull tomcat:8#nginx后不加版本标签的话,默认拉取的版本是最新版本 docker pull nginx docker pull tomcat:8#nginx后不加版本标签的话,默认拉取的版本是最新版本 docker pull nginx docker pull tomcat:8
2、启动nginx及tomcat
(1)启动前准备
关闭防火墙(若为云服务器则查看是否打开80安全组) systemctl stop firewalld setenforce 0 查看80端口是否被占用 lsof -i:80 若被占用则使用 kill -9 杀掉该进程关闭防火墙(若为云服务器则查看是否打开80安全组) systemctl stop firewalld setenforce 0 查看80端口是否被占用 lsof -i:80 若被占用则使用 kill -9 杀掉该进程关闭防火墙(若为云服务器则查看是否打开80安全组) systemctl stop firewalld setenforce 0 查看80端口是否被占用 lsof -i:80 若被占用则使用 kill -9 杀掉该进程
(2)使用docker启动nginx
docker run -d --name nginx01 -p 80:80 \ -v /mydata/nginx/nginx.conf:/etc/nginx/nginx.conf \ -v /mydata/nginx/conf.d:/etc/nginx/conf.d \ -v /mydata/nginx/html:/usr/share/nginx/html \ -v /mydata/nginx/logs:/var/log/nginx \ nginxdocker run -d --name nginx01 -p 80:80 \ -v /mydata/nginx/nginx.conf:/etc/nginx/nginx.conf \ -v /mydata/nginx/conf.d:/etc/nginx/conf.d \ -v /mydata/nginx/html:/usr/share/nginx/html \ -v /mydata/nginx/logs:/var/log/nginx \ nginxdocker run -d --name nginx01 -p 80:80 \ -v /mydata/nginx/nginx.conf:/etc/nginx/nginx.conf \ -v /mydata/nginx/conf.d:/etc/nginx/conf.d \ -v /mydata/nginx/html:/usr/share/nginx/html \ -v /mydata/nginx/logs:/var/log/nginx \ nginx
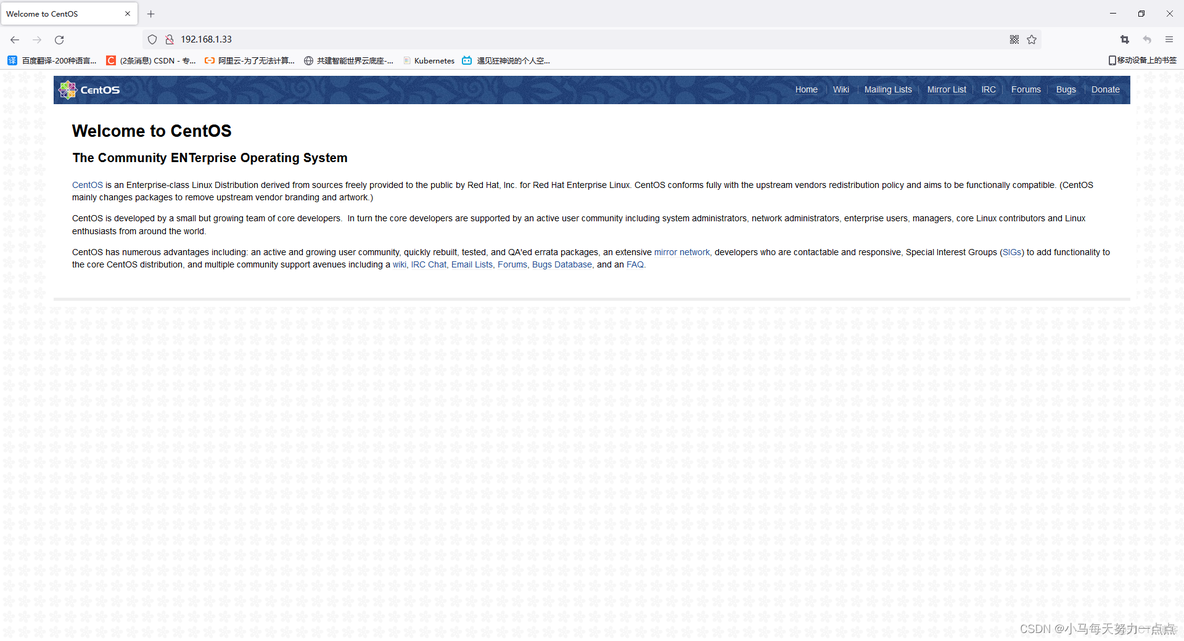
启动成功后可在浏览器测试 服务器地址:80
(3)启动两个tomcat
docker run -d -p 8081:8080 --name tomcat01 tomcat:8 docker run -d -p 8082:8080 --name tomcat02 tomcat:8docker run -d -p 8081:8080 --name tomcat01 tomcat:8 docker run -d -p 8082:8080 --name tomcat02 tomcat:8docker run -d -p 8081:8080 --name tomcat01 tomcat:8 docker run -d -p 8082:8080 --name tomcat02 tomcat:8
(4)修改tomcat主页面
进入已经运行的tomcat01容器分别修改
docker exec -it tomcat01 /bin/bash cd webapps/ROOT/ echo "8081" > index.jspdocker exec -it tomcat01 /bin/bash cd webapps/ROOT/ echo "8081" > index.jspdocker exec -it tomcat01 /bin/bash cd webapps/ROOT/ echo "8081" > index.jsp

同理进入tomcat02 将index.jsp 修改为8082
三、配置nginx
因为我们已经将nginx的配置文件挂载到本地,在本地修改配置文件即可。
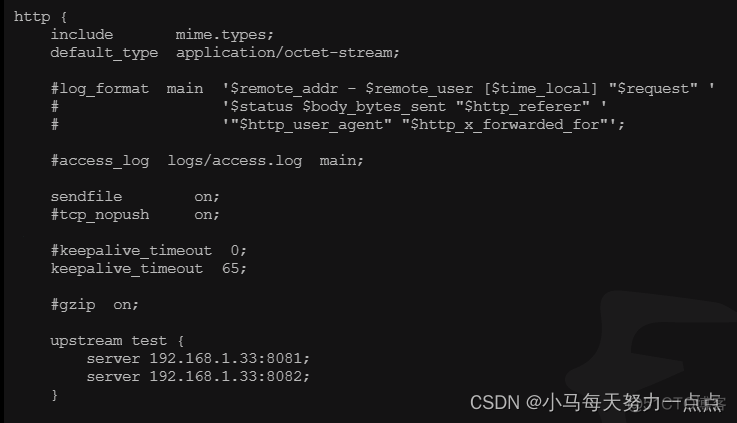
在http块下加入
#test可以随便写 server后面要加服务器IP和端口。 #不要忘记加;分号 upstream test { server 192.168.1.33:8081; server 192.168.1.33:8082; }#test可以随便写 server后面要加服务器IP和端口。 #不要忘记加;分号 upstream test { server 192.168.1.33:8081; server 192.168.1.33:8082; }#test可以随便写 server后面要加服务器IP和端口。 #不要忘记加;分号 upstream test { server 192.168.1.33:8081; server 192.168.1.33:8082; }
在server块修改
#此处的proxy_pass 是指用nginx的地址反向代理 test里面的服务器地址 #此处的test与upstream 后的test对应 #不要忘记加;分号 location / { proxy_pass http://test/; }#此处的proxy_pass 是指用nginx的地址反向代理 test里面的服务器地址 #此处的test与upstream 后的test对应 #不要忘记加;分号 location / { proxy_pass http://test/; }#此处的proxy_pass 是指用nginx的地址反向代理 test里面的服务器地址 #此处的test与upstream 后的test对应 #不要忘记加;分号 location / { proxy_pass http://test/; }
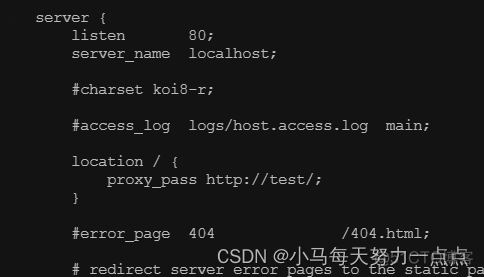
修改后退出保存nginx配置文件并重新启动nginx
docker restart nginx01docker restart nginx01docker restart nginx01
此时在浏览器访问nginx服务器
显示8081 此时是访问的tomcat01服务器

再次刷新页面
显示8082 此时是tomcat02服务器

负载均衡配置成功。
四、思考
若实际应用中 tomcat01服务器的性能要比tomcat02 好,例如CPU性能高,内存大,我们想尽可能的把用户的请求都打到tomcat01上,能够更好地缓解tomcat02服务器,该怎么办呢?
我们可以用nginx服务器设置权重轮询
首先我们进入nginx配置文件
在负载均衡配置处进行修改 加入weight
weight越高则代表权重越高 被用户访问的次数也就越高!!
upstream test { server 192.168.1.33:8081 weight=2; server 192.168.1.33:8082 weight=1; }upstream test { server 192.168.1.33:8081 weight=2; server 192.168.1.33:8082 weight=1; }upstream test { server 192.168.1.33:8081 weight=2; server 192.168.1.33:8082 weight=1; }

我们再重启一下nginx,进入网页测试
可以发现访问两次8081后才出现8082,也就说明权重配置成功了。
原文链接:https://blog.51cto.com/u_13259/10142717
© 版权声明
声明📢本站内容均来自互联网,归原创作者所有,如有侵权必删除。
本站文章皆由CC-4.0协议发布,如无来源则为原创,转载请注明出处。
THE END


