1、Nginx初识
(1)概念
Nginx是一个高性能的HTTP和反向代理服务器,特点是占有内存少,并发能力强,事实上nginx的并发能力确实在同类型的网页服务器中表现较好
Nginx可以作为静态页面的web服务器,同时还支持CGⅠ协议的动态语言,比如pexl、php等。但是不支持java。Java程序只能通过与tomcat配合完成。Nginx.专为性能优化而开发,性能是其最重要的考量, 实现上非常注重效率,能经受高负载的考验,有报告表明能支持高达50,000个并发连接数。
支持热部署,即使运行数个月也不需要重新启动,还能够在不间断的情况下对软件版本进行升级
占用内存少,并发能力强
(2)正向代理
Nginx 不仅可以做反向代理,实现负载均衡。还能用作正向代理来进行上网等功能。
正向代理:如果把局域网外的Internet想象成一个巨大的资源库,则局域网中的客户端要访问Internet,则需要通过代理服务器来访问,这种代理服务就称为正向代理。
(3)反向代理
反向代理,其实客户端对代理是无感知的,因为客户端不需要任何配置就可以访问(正向代理需要在客户端配置正向代理服务器),我们只需要将请求发送到反向代理服务器,由反向代理服务器去选择目标服务器获取数据后,再返回给客户端,此时反向代理服务器和目标服务器对外就是一个服务器,暴露的是代理服务器地址,隐藏了真实服务器地址。
客户端并不知道有代理服务器,而是将代理服务器和tomcat服务器作为一个服务器,对外暴露的是反向代理的端口号实际上访问的是tomcat
(4)负载均衡
在进行负载均衡之前所有的请求都由一台服务器来处理,负载均衡要做的是增加服务器的数量之后将请求分发到各个服务器上,将原来的请求集中到单个服务器的情况改为将请求分发到多个服务器上,降幅在分发到不同的服务器

负载均衡:

(5)动静分离
为了加快网站的解析速度,可以把动态页面和静态页面由不同的服务器来解析,加快解析速度。降低原来单个服务器的压力。
2、Nginx在linux中的安装
(1)在centos7中安装nginx的镜像
[root@aubin docker]# docker pull nginx Using default tag: latest latest: Pulling from library/nginx bb79b6b2107f: Already exists 111447d5894d: Pull complete a95689b8e6cb: Pull complete 1a0022e444c2: Pull complete 32b7488a3833: Pull complete Digest: sha256:ed7f815851b5299f616220a63edac69a4cc200e7f536a56e421988da82e44ed8 Status: Downloaded newer image for nginx:latest docker.io/library/nginx:latest[root@aubin docker]# docker pull nginx Using default tag: latest latest: Pulling from library/nginx bb79b6b2107f: Already exists 111447d5894d: Pull complete a95689b8e6cb: Pull complete 1a0022e444c2: Pull complete 32b7488a3833: Pull complete Digest: sha256:ed7f815851b5299f616220a63edac69a4cc200e7f536a56e421988da82e44ed8 Status: Downloaded newer image for nginx:latest docker.io/library/nginx:latest[root@aubin docker]# docker pull nginx Using default tag: latest latest: Pulling from library/nginx bb79b6b2107f: Already exists 111447d5894d: Pull complete a95689b8e6cb: Pull complete 1a0022e444c2: Pull complete 32b7488a3833: Pull complete Digest: sha256:ed7f815851b5299f616220a63edac69a4cc200e7f536a56e421988da82e44ed8 Status: Downloaded newer image for nginx:latest docker.io/library/nginx:latest
(2)创建nginx镜像的相应容器并将日志和配置文件拷贝到宿主机
[root@aubin docker]# docker run --name nginx -d -p 8080:80 nginx[root@aubin docker]# docker run --name nginx -d -p 8080:80 nginx[root@aubin docker]# docker run --name nginx -d -p 8080:80 nginx
[root@aubin /]# docker cp nginx:/etc/nginx/ /home/admin/volume/nginx/config [root@aubin /]# docker cp nginx:/var/log/nginx /home/admin/volume/nginx/log [root@aubin /]# cd / [root@aubin /]# ls bin boot dev etc home lib lib64 media mnt opt proc root run sbin srv sys tmp usr var zzyyuse [root@aubin /]# cd home/zhaihuabing [root@aubin zhaihuabing]# ls volume [root@aubin zhaihuabing]# cd volume/nginx [root@aubin nginx]# ls config log [root@aubin nginx]# cd log [root@aubin log]# ls access.log error.log[root@aubin /]# docker cp nginx:/etc/nginx/ /home/admin/volume/nginx/config [root@aubin /]# docker cp nginx:/var/log/nginx /home/admin/volume/nginx/log [root@aubin /]# cd / [root@aubin /]# ls bin boot dev etc home lib lib64 media mnt opt proc root run sbin srv sys tmp usr var zzyyuse [root@aubin /]# cd home/zhaihuabing [root@aubin zhaihuabing]# ls volume [root@aubin zhaihuabing]# cd volume/nginx [root@aubin nginx]# ls config log [root@aubin nginx]# cd log [root@aubin log]# ls access.log error.log[root@aubin /]# docker cp nginx:/etc/nginx/ /home/admin/volume/nginx/config [root@aubin /]# docker cp nginx:/var/log/nginx /home/admin/volume/nginx/log [root@aubin /]# cd / [root@aubin /]# ls bin boot dev etc home lib lib64 media mnt opt proc root run sbin srv sys tmp usr var zzyyuse [root@aubin /]# cd home/zhaihuabing [root@aubin zhaihuabing]# ls volume [root@aubin zhaihuabing]# cd volume/nginx [root@aubin nginx]# ls config log [root@aubin nginx]# cd log [root@aubin log]# ls access.log error.log
(3)关闭临时的nginx容器
[root@aubin log]# docker kill nginx nginx [root@aubin log]# docker rm nginx nginx[root@aubin log]# docker kill nginx nginx [root@aubin log]# docker rm nginx nginx[root@aubin log]# docker kill nginx nginx [root@aubin log]# docker rm nginx nginx
(4)正式启动nginx
docker run -d <br>--name nginx <br>-p 80:80<br>-v /home/admin/volume/nginx/config/nginx:/etc/nginx <br>-v /home/admin/volume/nginx/log/nginx:/var/log/nginx nginxdocker run -d <br>--name nginx <br>-p 80:80<br>-v /home/admin/volume/nginx/config/nginx:/etc/nginx <br>-v /home/admin/volume/nginx/log/nginx:/var/log/nginx nginxdocker run -d
--name nginx
-p 80:80
-v /home/admin/volume/nginx/config/nginx:/etc/nginx
-v /home/admin/volume/nginx/log/nginx:/var/log/nginx nginx
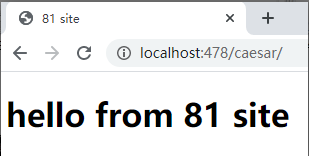
(5)测试:linux的IP加nginx的端口号

3、Nginx常用命令
(1)以前台运行的方式进入Nginx
[root@aubin etc]# docker ps CONTAINER ID IMAGE COMMAND CREATED STATUS PORTS NAMES 26881e7ccf13 nginx "/docker-entrypoint.猞" About an hour ago Up About an hour 0.0.0.0:80->80/tcp nginx fc5f28e676c7 redis "猞"15 hours ago Up 15 hours 0.0.0.0:6379->6379/tcp myredis1 [root@aubin etc]# docker exec -it 26881e7ccf13 /bin/bash[root@aubin etc]# docker ps CONTAINER ID IMAGE COMMAND CREATED STATUS PORTS NAMES 26881e7ccf13 nginx "/docker-entrypoint.猞" About an hour ago Up About an hour 0.0.0.0:80->80/tcp nginx fc5f28e676c7 redis "猞"15 hours ago Up 15 hours 0.0.0.0:6379->6379/tcp myredis1 [root@aubin etc]# docker exec -it 26881e7ccf13 /bin/bash[root@aubin etc]# docker ps CONTAINER ID IMAGE COMMAND CREATED STATUS PORTS NAMES 26881e7ccf13 nginx "/docker-entrypoint.猞" About an hour ago Up About an hour 0.0.0.0:80->80/tcp nginx fc5f28e676c7 redis "猞"15 hours ago Up 15 hours 0.0.0.0:6379->6379/tcp myredis1 [root@aubin etc]# docker exec -it 26881e7ccf13 /bin/bash
(2)查看版本号
root@26881e7ccf13:/# nginx -v nginx version: nginx/1.19.3root@26881e7ccf13:/# nginx -v nginx version: nginx/1.19.3root@26881e7ccf13:/# nginx -v nginx version: nginx/1.19.3
(3)检查对文件的修改是否正确
root@26881e7ccf13:/# nginx -t nginx: the configuration file /etc/nginx/ syntax is ok nginx: configuration file /etc/nginx/ test is successfulroot@26881e7ccf13:/# nginx -t nginx: the configuration file /etc/nginx/ syntax is ok nginx: configuration file /etc/nginx/ test is successfulroot@26881e7ccf13:/# nginx -t nginx: the configuration file /etc/nginx/ syntax is ok nginx: configuration file /etc/nginx/ test is successful
(4)重新启动
root@26881e7ccf13:/# nginx -s reload 2020/10/2803:05:45 [notice] 53#53: signal process startedroot@26881e7ccf13:/# nginx -s reload 2020/10/2803:05:45 [notice] 53#53: signal process startedroot@26881e7ccf13:/# nginx -s reload 2020/10/2803:05:45 [notice] 53#53: signal process started
(5)停止
root@26881e7ccf13:/# nginx -s stop 2020/10/2803:05:57 [notice] 55#55: signal process startedroot@26881e7ccf13:/# nginx -s stop 2020/10/2803:05:57 [notice] 55#55: signal process startedroot@26881e7ccf13:/# nginx -s stop 2020/10/2803:05:57 [notice] 55#55: signal process started
(6)查看进程
[root@aubin etc]# ps -ef|grep nginx root 2170818477011:09 pts/000:00:00 grep --color=auto nginx[root@aubin etc]# ps -ef|grep nginx root 2170818477011:09 pts/000:00:00 grep --color=auto nginx[root@aubin etc]# ps -ef|grep nginx root 2170818477011:09 pts/000:00:00 grep --color=auto nginx
4、nginx的配置文件
(1)打开配置文件
root@ba4e30b7f0b4:/# ls bin boot dev docker-entrypoint.d h etc home lib lib64 media mnt opt proc root run sbin srv sys tmp usr var root@ba4e30b7f0b4:/# cd etc root@ba4e30b7f0b4:/etc# ls adduser.conf debconf.conf gai.conf hosts ld.so. motd passwd rc4.d selinux systemd alternatives debian_version group init.d ldap mtab passwd- rc5.d shadow terminfo apt default group- inputrc libaudit.conf nginx profile rc6.d shadow- timezone bash.bashrc deluser.conf gshadow issue localtime nsswitch.conf profile.d rcS.d shells ucf.conf bindresvport.blacklist dpkg gshadow- issue.net login.defs opt rc0.d resolv.conf skel update-motd.d ca-certificates environment gss kernel logrotate.d os-release rc1.d rmt ssl xattr.conf ca-certificates.conf fonts host.conf ld.so.cache machine-id pam.conf rc2.d securetty subgid cron.daily fstab hostname ld.so.conf mke2fs.conf pam.d rc3.d security subuid root@ba4e30b7f0b4:/etc# cd nginx root@ba4e30b7f0b4:/etc/nginx# ls fastcgi_params koi-utf koi-win mime.types modules scgi_params uwsgi_params win-utf root@ba4e30b7f0b4:/etc/nginx# catroot@ba4e30b7f0b4:/# ls bin boot dev docker-entrypoint.d h etc home lib lib64 media mnt opt proc root run sbin srv sys tmp usr var root@ba4e30b7f0b4:/# cd etc root@ba4e30b7f0b4:/etc# ls adduser.conf debconf.conf gai.conf hosts ld.so. motd passwd rc4.d selinux systemd alternatives debian_version group init.d ldap mtab passwd- rc5.d shadow terminfo apt default group- inputrc libaudit.conf nginx profile rc6.d shadow- timezone bash.bashrc deluser.conf gshadow issue localtime nsswitch.conf profile.d rcS.d shells ucf.conf bindresvport.blacklist dpkg gshadow- issue.net login.defs opt rc0.d resolv.conf skel update-motd.d ca-certificates environment gss kernel logrotate.d os-release rc1.d rmt ssl xattr.conf ca-certificates.conf fonts host.conf ld.so.cache machine-id pam.conf rc2.d securetty subgid cron.daily fstab hostname ld.so.conf mke2fs.conf pam.d rc3.d security subuid root@ba4e30b7f0b4:/etc# cd nginx root@ba4e30b7f0b4:/etc/nginx# ls fastcgi_params koi-utf koi-win mime.types modules scgi_params uwsgi_params win-utf root@ba4e30b7f0b4:/etc/nginx# catroot@ba4e30b7f0b4:/# ls bin boot dev docker-entrypoint.d h etc home lib lib64 media mnt opt proc root run sbin srv sys tmp usr var root@ba4e30b7f0b4:/# cd etc root@ba4e30b7f0b4:/etc# ls adduser.conf debconf.conf gai.conf hosts ld.so. motd passwd rc4.d selinux systemd alternatives debian_version group init.d ldap mtab passwd- rc5.d shadow terminfo apt default group- inputrc libaudit.conf nginx profile rc6.d shadow- timezone bash.bashrc deluser.conf gshadow issue localtime nsswitch.conf profile.d rcS.d shells ucf.conf bindresvport.blacklist dpkg gshadow- issue.net login.defs opt rc0.d resolv.conf skel update-motd.d ca-certificates environment gss kernel logrotate.d os-release rc1.d rmt ssl xattr.conf ca-certificates.conf fonts host.conf ld.so.cache machine-id pam.conf rc2.d securetty subgid cron.daily fstab hostname ld.so.conf mke2fs.conf pam.d rc3.d security subuid root@ba4e30b7f0b4:/etc# cd nginx root@ba4e30b7f0b4:/etc/nginx# ls fastcgi_params koi-utf koi-win mime.types modules scgi_params uwsgi_params win-utf root@ba4e30b7f0b4:/etc/nginx# cat
(2)配置文件解析(核心配置文件)
root@ba4e30b7f0b4:/etc/nginx# cat user nginx; worker_processes 1; 以上是全局块,work_processes的数值越大,Nginx的并发能力就越强 error_log /var/log/nginx/error.log warn; nginx的错误日志存放的位置 pid /var/run/nginx.pid; Nginx的运行标识 events { worker_connections 1024; 数值越大并发能力越强 } http { include /etc/nginx/ 引入一个外部的文件 default_type application/octet-stream; log_format main '$remote_addr - $remote_user [$time_local] "$request" ''$status $body_bytes_sent "$http_referer" ''"$http_user_agent" "$http_x_forwarded_for"'; access_log /var/log/nginx/access.log main; sendfile on; #tcp_nopush on; keepalive_timeout 65; #gzip on; include /etc/nginx//*.conf; 引入配置文件(目录下以.conf结尾的配置文件) }root@ba4e30b7f0b4:/etc/nginx# cat user nginx; worker_processes 1; 以上是全局块,work_processes的数值越大,Nginx的并发能力就越强 error_log /var/log/nginx/error.log warn; nginx的错误日志存放的位置 pid /var/run/nginx.pid; Nginx的运行标识 events { worker_connections 1024; 数值越大并发能力越强 } http { include /etc/nginx/ 引入一个外部的文件 default_type application/octet-stream; log_format main '$remote_addr - $remote_user [$time_local] "$request" ''$status $body_bytes_sent "$http_referer" ''"$http_user_agent" "$http_x_forwarded_for"'; access_log /var/log/nginx/access.log main; sendfile on; #tcp_nopush on; keepalive_timeout 65; #gzip on; include /etc/nginx//*.conf; 引入配置文件(目录下以.conf结尾的配置文件) }root@ba4e30b7f0b4:/etc/nginx# cat user nginx; worker_processes 1; 以上是全局块,work_processes的数值越大,Nginx的并发能力就越强 error_log /var/log/nginx/error.log warn; nginx的错误日志存放的位置 pid /var/run/nginx.pid; Nginx的运行标识 events { worker_connections 1024; 数值越大并发能力越强 } http { include /etc/nginx/ 引入一个外部的文件 default_type application/octet-stream; log_format main '$remote_addr - $remote_user [$time_local] "$request" ''$status $body_bytes_sent "$http_referer" ''"$http_user_agent" "$http_x_forwarded_for"'; access_log /var/log/nginx/access.log main; sendfile on; #tcp_nopush on; keepalive_timeout 65; #gzip on; include /etc/nginx//*.conf; 引入配置文件(目录下以.conf结尾的配置文件) }
(3)配置文件的解析下的default.conf
root@ba4e30b7f0b4:/etc/nginx# ls fastcgi_params koi-utf koi-win mime.types modules scgi_params uwsgi_params win-utf root@ba4e30b7f0b4:/etc/nginx# cd root@ba4e30b7f0b4:/etc/nginx/# ls default.conf root@ba4e30b7f0b4:/etc/nginx/# cat default.conf server { listen 80; nginx监听的端口号 listen [::]:80; server_name localhost; localhost代表nginx接受请求的IP location / { root /usr/share/nginx/html; 根据此路径去查找静态资源 index index.html index.htm; 默认去此路径找到index文件 } error_page 500 502 503 504 /50x.html; location = /50x.html { root /usr/share/nginx/html; } }root@ba4e30b7f0b4:/etc/nginx# ls fastcgi_params koi-utf koi-win mime.types modules scgi_params uwsgi_params win-utf root@ba4e30b7f0b4:/etc/nginx# cd root@ba4e30b7f0b4:/etc/nginx/# ls default.conf root@ba4e30b7f0b4:/etc/nginx/# cat default.conf server { listen 80; nginx监听的端口号 listen [::]:80; server_name localhost; localhost代表nginx接受请求的IP location / { root /usr/share/nginx/html; 根据此路径去查找静态资源 index index.html index.htm; 默认去此路径找到index文件 } error_page 500 502 503 504 /50x.html; location = /50x.html { root /usr/share/nginx/html; } }root@ba4e30b7f0b4:/etc/nginx# ls fastcgi_params koi-utf koi-win mime.types modules scgi_params uwsgi_params win-utf root@ba4e30b7f0b4:/etc/nginx# cd root@ba4e30b7f0b4:/etc/nginx/# ls default.conf root@ba4e30b7f0b4:/etc/nginx/# cat default.conf server { listen 80; nginx监听的端口号 listen [::]:80; server_name localhost; localhost代表nginx接受请求的IP location / { root /usr/share/nginx/html; 根据此路径去查找静态资源 index index.html index.htm; 默认去此路径找到index文件 } error_page 500 502 503 504 /50x.html; location = /50x.html { root /usr/share/nginx/html; } }
原文链接:https://blog.csdn.net/weixin_39722025/article/details/109917742