一、应用场景
最初的部署形式如下图:

由于这种形式无法实现热发布,业务整天都有人在访问,代码更新后只有下班后才能发布,现在为了能实时更新代码,并且实现负债均衡,将引入nginx服务器。
引入nginx服务后的部署图如下:

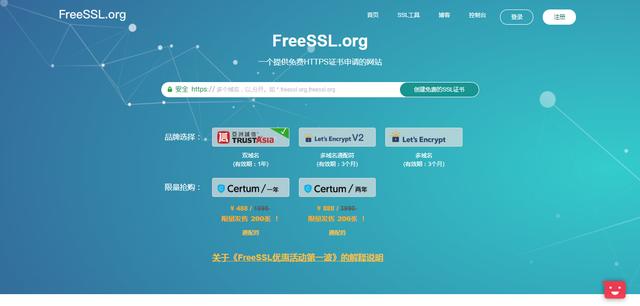
请求顺序是123478或者125678,所有请求都是通过https的形式,所以接下来需要生成https证书.
二、https所需证书的生成
(一)下载openssl软件及安装配置
1. 安装Openssl
下载地址:http://slproweb.com/products/Win32OpenSSL.html (根据系统选择32位或者64位版本下载安装)。
下载完成后,进行安装,我的安装目录是D:\Program Files\OpenSSL-Win64。
2. 安装ActivePerl (此软件目的为了解析pl文件,部分系统不安装也可以实现本教程的功能,安装该软件目的为了学习perl)。
下载地址:http://www.activestate.com/activeperl/downloads/ (根据系统选择win32或者win64版本下载安装)。
3. 配置环境变量
在环境变量中添加环境变量
变量名: OPENSSL_HOME 变量值:D:\Program Files\OpenSSL-Win64\bin; (变量值为openssl安装位置)
在path变量结尾添加如下 : %OPENSSL_HOME%;
(二)生成ssl证书(本实验的密码统一为123456)
1.首先要生成服务器端的私钥(key文件):
openssl genrsa -des3 -out server.key 1024
运行时会提示输入密码,此密码用于加密key文件
去除key文件口令的命令:
openssl rsa -in server.key -out server.key
D:\SSL\test>openssl genrsa -des3 -out server.key 1024
Generating RSA private key, 1024 bit long modulus (2 primes)
……………..+++++
………………..+++++
e is 65537 (0x010001)
Enter pass phrase for server.key:此处输入密码123456
Verifying – Enter pass phrase for server.key:此处输入密码123456D:\SSL\test>openssl rsa -in server.key -out server.key
Enter pass phrase for server.key:此处输入密码123456
writing RSA keyD:\SSL\test>
2.openssl req -new -key server.key -out server.csr
生成Certificate Signing Request(CSR),生成的csr文件交给CA签名后形成服务端自己的证书.屏幕上将有提示,依照其指示一步一步输入要求的个人信息即可.如果需要指定配置文件,则可以在文件末尾加上 -config openssl.cnf。
D:\SSL\test>openssl req -new -key server.key -out server.csr
You are about to be asked to enter information that will be incorporated
into your certificate request.
What you are about to enter is what is called a Distinguished Name or a DN.
There are quite a few fields but you can leave some blank
For some fields there will be a default value,
If you enter '.', the field will be left blank.
—–
Country Name (2 letter code) [AU]:CN
State or Province Name (full name) [Some-State]:GZ
Locality Name (eg, city) []:GY
Organization Name (eg, company) [Internet Widgits Pty Ltd]:XT
Organizational Unit Name (eg, section) []:KF
Common Name (e.g. server FQDN or YOUR name) []:server
Email Address []:Please enter the following 'extra' attributes
to be sent with your certificate request
A challenge password []:123456
An optional company name []:D:\SSL\test>
3.对客户端也作同样的命令生成key及csr文件:
openssl genrsa -des3 -out client.key 1024
openssl req -new -key client.key -out client.csr
D:\SSL\test>openssl genrsa -des3 -out client.key 1024
Generating RSA private key, 1024 bit long modulus (2 primes)
…+++++
……………………………………………………+++++
e is 65537 (0x010001)
Enter pass phrase for client.key:此处输入密码123456
Verifying – Enter pass phrase for client.key:此处输入密码123456D:\SSL\test>openssl req -new -key client.key -out client.csr
Enter pass phrase for client.key:此处输入密码123456
You are about to be asked to enter information that will be incorporated
into your certificate request.
What you are about to enter is what is called a Distinguished Name or a DN.
There are quite a few fields but you can leave some blank
For some fields there will be a default value,
If you enter '.', the field will be left blank.
—–
Country Name (2 letter code) [AU]:CN
State or Province Name (full name) [Some-State]:GZ
Locality Name (eg, city) []:GY
Organization Name (eg, company) [Internet Widgits Pty Ltd]:XT
Organizational Unit Name (eg, section) []:KF
Common Name (e.g. server FQDN or YOUR name) []:client
Email Address []:Please enter the following 'extra' attributes
to be sent with your certificate request
A challenge password []:123456
An optional company name []:D:\SSL\test>
如果需要指定配置文件,则可以在文件末尾加上-config openssl.cnf。
4.CSR文件必须有CA的签名才可形成证书.可将此文件发送到verisign等地方由它验证.自己生成:
openssl req -new -x509 -keyout ca.key -out ca.crt
D:\SSL\test>openssl req -new -x509 -keyout ca.key -out ca.crt
Generating a RSA private key
………………………………………………………..+++++
………………………….+++++
writing new private key to 'ca.key'
Enter PEM pass phrase:
Verifying – Enter PEM pass phrase:
—–
You are about to be asked to enter information that will be incorporated
into your certificate request.
What you are about to enter is what is called a Distinguished Name or a DN.
There are quite a few fields but you can leave some blank
For some fields there will be a default value,
If you enter '.', the field will be left blank.
—–
Country Name (2 letter code) [AU]:CN
State or Province Name (full name) [Some-State]:GZ
Locality Name (eg, city) []:GY
Organization Name (eg, company) [Internet Widgits Pty Ltd]:XT
Organizational Unit Name (eg, section) []:KJ
Common Name (e.g. server FQDN or YOUR name) []:ca
Email Address []:D:\SSL\test>
如果需要指定配置文件,则可以在文件末尾加上-config openssl.cnf。
5.用生成的CA的证书为刚才生成的server.csr,client.csr文件签名:
Openssl ca -in server.csr -out server.crt -cert ca.crt -keyfile ca.key -config openssl.cnf
Openssl ca -in client.csr -out client.crt -cert ca.crt -keyfile ca.key -config openssl.cnf
注意: 此时会出错:Using configuration from /usr/share/ssl/openssl.cnf I am unable to access the ./demoCA/newcerts directory ./demoCA/newcerts: No such file or directory
解决方法: 1).mkdir -p ./demoCA/newcerts
2).touch demoCA/index.txt
3).touch demoCA/serial
4).echo 01 > demoCA/serial
注:本解决方法针对linux而言,如果在windows上,只需在证书生成当前目录新建文件夹demoCA,在demoCA文件夹下面新建index.txt和serial两个文件,然后运行命令echo 01 > demoCA/serial,最后再运行命令
Openssl ca -in server.csr -out server.crt -cert ca.crt -keyfile ca.key
Openssl ca -in client.csr -out client.crt -cert ca.crt -keyfile ca.key
D:\SSL\test>Openssl ca -in server.csr -out server.crt -cert ca.crt -keyfile ca.key
Using configuration from C:\Program Files\Common Files\SSL/openssl.cnf
Enter pass phrase for ca.key:
Check that the request matches the signature
Signature ok
Certificate Details:
Serial Number: 1 (0x1)
Validity
Not Before: Jul 8 06:37:04 2019 GMT
Not After : Jul 7 06:37:04 2020 GMT
Subject:
countryName = CN
stateOrProvinceName = GZ
organizationName = XT
organizationalUnitName = KF
commonName = server
X509v3 extensions:
X509v3 Basic Constraints:
CA:FALSE
Netscape Comment:
OpenSSL Generated Certificate
X509v3 Subject Key Identifier:
BD:81:63:FD:53:39:46:AC:2C:22:8D:AA:1C:1A:24:C5:19:15:A9:60
X509v3 Authority Key Identifier:
keyid:6B:35:B1:E7:31:38:FE:85:06:6F:F7:60:1D:31:C1:F1:34:12:1A:46Certificate is to be certified until Jul 7 06:37:04 2020 GMT (365 days)
Sign the certificate? [y/n]:y1 out of 1 certificate requests certified, commit? [y/n]y
Write out database with 1 new entries
Data Base UpdatedD:\SSL\test>Openssl ca -in client.csr -out client.crt -cert ca.crt -keyfile ca.key
Using configuration from C:\Program Files\Common Files\SSL/openssl.cnf
Enter pass phrase for ca.key:
Check that the request matches the signature
Signature ok
Certificate Details:
Serial Number: 2 (0x2)
Validity
Not Before: Jul 8 06:37:49 2019 GMT
Not After : Jul 7 06:37:49 2020 GMT
Subject:
countryName = CN
stateOrProvinceName = GZ
organizationName = XT
organizationalUnitName = KF
commonName = client
X509v3 extensions:
X509v3 Basic Constraints:
CA:FALSE
Netscape Comment:
OpenSSL Generated Certificate
X509v3 Subject Key Identifier:
53:9E:8B:40:26:12:BD:53:4D:C2:F9:B9:37:4A:29:5F:EE:7B:8E:4F
X509v3 Authority Key Identifier:
keyid:6B:35:B1:E7:31:38:FE:85:06:6F:F7:60:1D:31:C1:F1:34:12:1A:46Certificate is to be certified until Jul 7 06:37:49 2020 GMT (365 days)
Sign the certificate? [y/n]:y1 out of 1 certificate requests certified, commit? [y/n]y
Write out database with 1 new entries
Data Base Updated
6.合并证书文件(crt)和私钥文件(key)
linux合并命令:
1).cat client.crt client.key > client.pem
2).cat server.crt server.key > server.pem
windows合并命令:
1).typeclient.crt client.key > client.pem
2).type server.crt server.key > server.pem
D:\SSL\test>type client.crt client.key > client.pem
client.crt
client.key
D:\SSL\test>type server.crt server.key > server.pem
server.crt
server.key
D:\SSL\test>
7.合并成pfx证书
1).openssl pkcs12 -export -clcerts -in client.crt -inkey client.key -out client.p12 -name client
2).openssl pkcs12 -export -clcerts -in server.crt -inkey server.key -out server.p12 -name server
D:\SSL\test>openssl pkcs12 -export -clcerts -in client.crt -inkey client.key -out client.p12 -name client
Enter pass phrase for client.key:
Enter Export Password:
Verifying – Enter Export Password:D:\SSL\test>openssl pkcs12 -export -clcerts -in server.crt -inkey server.key -out server.p12 -name server
Enter Export Password:
Verifying – Enter Export Password:D:\SSL\test>
8.通过.p12证书生成.keystore证书
1)keytool -importkeystore -srckeystore server.p12 -srcstoretype PKCS12 -deststoretype JKS -destkeystore server.keystore
2)keytool -importkeystore -srckeystore client.p12 -srcstoretype PKCS12 -deststoretype JKS -destkeystore client.keystore
D:\SSL\test>keytool -importkeystore -srckeystore server.p12 -srcstoretype PKCS12 -deststoretype JKS -destkeystore server.keystore
输入目标密钥库口令:
再次输入新口令:
输入源密钥库口令:
已成功导入别名 server 的条目。
已完成导入命令: 1 个条目成功导入, 0 个条目失败或取消D:\SSL\test>keytool -importkeystore -srckeystore client.p12 -srcstoretype PKCS12 -deststoretype JKS -destkeystore client.keystore
输入目标密钥库口令:
再次输入新口令:
输入源密钥库口令:
已成功导入别名 client 的条目。
已完成导入命令: 1 个条目成功导入, 0 个条目失败或取消D:\SSL\test>
9.从.keystore中导出.cer证书
1)keytool -export -alias server -keystore server.keystore -rfc -file server.cer
2)keytool -export -alias client -keystore client.keystore -rfc -file client.cer
D:\SSL\test>keytool -export -alias server -keystore server.keystore -rfc -file server.cer
输入密钥库口令:
存储在文件 <server.cer> 中的证书D:\SSL\test>keytool -export -alias client -keystore client.keystore -rfc -file client.cer
输入密钥库口令:
存储在文件 <client.cer> 中的证书D:\SSL\test>
10.从ca.crt中导出.cer证书
openssl x509 -in ca.crt -out ca.cer -outform der
D:\SSL\test>openssl x509 -in ca.crt -out ca.cer -outform der
D:\SSL\test>
11.制作信任证书.truststore
1)Keytool -import -alias server -file server.cer -keystore client.truststore
2)Keytool -import -alias ca -file ca.cer -keystore server.truststore
3)Keytool -import -alias ca -file ca.cer -keystore client.truststore
4)Keytool -import -alias client -file client.cer -keystore server.truststore
D:\SSL\test>Keytool -import -alias server -file server.cer -keystore client.truststore
输入密钥库口令:
再次输入新口令:
所有者: CN=server, OU=KF, O=XT, ST=GZ, C=CN
发布者: CN=ca, OU=KJ, O=XT, L=GY, ST=GZ, C=CN
序列号: 1
有效期开始日期: Mon Jul 08 14:37:04 CST 2019, 截止日期: Tue Jul 07 14:37:04 CST 2020
证书指纹:
MD5: 86:96:B1:8E:F0:79:BD:F3:6C:05:62:62:E8:27:38:88
SHA1: C1:F3:36:FC:E7:E7:C4:93:CC:C1:67:36:09:A8:C9:2E:45:11:91:18
SHA256: 4F:1C:04:1A:F3:FF:CE:BB:61:8B:16:36:0D:44:F9:6E:4D:FA:0F:8A:5B:
FE:A8:B4:C9:79:DE:43:0C:3C:A9:77
签名算法名称: SHA256withRSA
版本: 3扩展:
#1: ObjectId: 2.16.840.1.113730.1.13 Criticality=false
0000: 16 1D 4F 70 65 6E 53 53 4C 20 47 65 6E 65 72 61 ..OpenSSL Genera
0010: 74 65 64 20 43 65 72 74 69 66 69 63 61 74 65 ted Certificate#2: ObjectId: 2.5.29.35 Criticality=false
AuthorityKeyIdentifier [
KeyIdentifier [
0000: 6B 35 B1 E7 31 38 FE 85 06 6F F7 60 1D 31 C1 F1 k5..18…o.`.1..
0010: 34 12 1A 46 4..F
]
]#3: ObjectId: 2.5.29.19 Criticality=false
BasicConstraints:[
CA:false
PathLen: undefined
]#4: ObjectId: 2.5.29.14 Criticality=false
SubjectKeyIdentifier [
KeyIdentifier [
0000: BD 81 63 FD 53 39 46 AC 2C 22 8D AA 1C 1A 24 C5 ..c.S9F.,"….$.
0010: 19 15 A9 60 …`
]
]是否信任此证书? [否]: y
证书已添加到密钥库中D:\SSL\test>Keytool -import -alias ca -file ca.cer -keystore server.truststore
输入密钥库口令:
再次输入新口令:
所有者: CN=ca, OU=KJ, O=XT, L=GY, ST=GZ, C=CN
发布者: CN=ca, OU=KJ, O=XT, L=GY, ST=GZ, C=CN
序列号: 67e9301c33c7533ccff67637e4438bf720b52393
有效期开始日期: Mon Jul 08 14:36:08 CST 2019, 截止日期: Wed Aug 07 14:36:08 CST
2019
证书指纹:
MD5: 4D:4B:6E:1F:AE:74:C8:76:2F:6D:FD:09:2D:D9:E8:BF
SHA1: 15:D2:99:5C:20:E1:87:42:7D:D2:75:B1:9C:93:2B:3F:06:1F:32:11
SHA256: C9:31:C3:94:DC:FB:76:56:87:11:BE:06:C5:00:B5:90:26:75:63:07:18:
36:49:7A:7C:92:61:76:16:A7:B6:70
签名算法名称: SHA256withRSA
版本: 3扩展:
#1: ObjectId: 2.5.29.35 Criticality=false
AuthorityKeyIdentifier [
KeyIdentifier [
0000: 6B 35 B1 E7 31 38 FE 85 06 6F F7 60 1D 31 C1 F1 k5..18…o.`.1..
0010: 34 12 1A 46 4..F
]
]#2: ObjectId: 2.5.29.19 Criticality=true
BasicConstraints:[
CA:true
PathLen:2147483647
]#3: ObjectId: 2.5.29.14 Criticality=false
SubjectKeyIdentifier [
KeyIdentifier [
0000: 6B 35 B1 E7 31 38 FE 85 06 6F F7 60 1D 31 C1 F1 k5..18…o.`.1..
0010: 34 12 1A 46 4..F
]
]是否信任此证书? [否]: y
证书已添加到密钥库中D:\SSL\test>Keytool -import -alias ca -file ca.cer -keystore client.truststore
输入密钥库口令:
所有者: CN=ca, OU=KJ, O=XT, L=GY, ST=GZ, C=CN
发布者: CN=ca, OU=KJ, O=XT, L=GY, ST=GZ, C=CN
序列号: 67e9301c33c7533ccff67637e4438bf720b52393
有效期开始日期: Mon Jul 08 14:36:08 CST 2019, 截止日期: Wed Aug 07 14:36:08 CST
2019
证书指纹:
MD5: 4D:4B:6E:1F:AE:74:C8:76:2F:6D:FD:09:2D:D9:E8:BF
SHA1: 15:D2:99:5C:20:E1:87:42:7D:D2:75:B1:9C:93:2B:3F:06:1F:32:11
SHA256: C9:31:C3:94:DC:FB:76:56:87:11:BE:06:C5:00:B5:90:26:75:63:07:18:
36:49:7A:7C:92:61:76:16:A7:B6:70
签名算法名称: SHA256withRSA
版本: 3扩展:
#1: ObjectId: 2.5.29.35 Criticality=false
AuthorityKeyIdentifier [
KeyIdentifier [
0000: 6B 35 B1 E7 31 38 FE 85 06 6F F7 60 1D 31 C1 F1 k5..18…o.`.1..
0010: 34 12 1A 46 4..F
]
]#2: ObjectId: 2.5.29.19 Criticality=true
BasicConstraints:[
CA:true
PathLen:2147483647
]#3: ObjectId: 2.5.29.14 Criticality=false
SubjectKeyIdentifier [
KeyIdentifier [
0000: 6B 35 B1 E7 31 38 FE 85 06 6F F7 60 1D 31 C1 F1 k5..18…o.`.1..
0010: 34 12 1A 46 4..F
]
]是否信任此证书? [否]: y
证书已添加到密钥库中D:\SSL\test>Keytool -import -alias client -file client.cer -keystore server.truststore
输入密钥库口令:
证书已添加到密钥库中D:\SSL\test>
三、证书在各个环节的部署
(一)tomcat里的配置
修改tomcat的server.xml,把证书集成到被访问的端口上。
<Connector SSLEnabled="true" acceptCount="100" algorithm="SunX509" clientAuth="true"
disableUploadTimeout="true" enableLookups="false" keystoreFile="D:/SSL/test/server.keystore"
keystorePass="123456" maxHttpHeaderSize="8192" maxSpareThreads="75" maxThreads="150" minSpareThreads="25"
port="9001" protocol="org.apache.coyote.http11.Http11NioProtocol" scheme="https" secure="true"
sslProtocol="TLS" truststoreFile="D:/SSL/test/server.truststore" truststorePass="123456" truststoreType="JKS" proxyPort="443"/>
(二)nginx配置
修改nginx.conf文件
1、找到该文件中如下代码的位置进行修改:

# HTTPS server # #server { # listen 443 ssl; # server_name localhost; # ssl_certificate cert.pem; # ssl_certificate_key cert.key; # ssl_session_cache shared:SSL:1m; # ssl_session_timeout 5m; # ssl_ciphers HIGH:!aNULL:!MD5; # ssl_prefer_server_ciphers on; # location / { # root html; # index index.html index.htm; # } #}</pre> # ssl_certificate cert.pem; # ssl_certificate_key cert.key; # ssl_session_cache shared:SSL:1m; # ssl_session_timeout 5m; # ssl_ciphers HIGH:!aNULL:!MD5; # ssl_prefer_server_ciphers on; # location / { # root html; # index index.html index.htm; # } #}</pre> # ssl_certificate cert.pem; # ssl_certificate_key cert.key; # ssl_session_cache shared:SSL:1m; # ssl_session_timeout 5m; # ssl_ciphers HIGH:!aNULL:!MD5; # ssl_prefer_server_ciphers on; # location / { # root html; # index index.html index.htm; # } #}</pre>
原文链接:https://blog.csdn.net/u013551662/article/details/118760792