目录
一.HTTP服务器
1.配置ip
2.安装软件及开发包
3.源码编译及安装
4.添加httpd系统服务
5.配置httpd服务开机启动
6.启动Apache服务
二.DNS解析
1.安装dns包
2.主DNS配置
3.添加benet.com区域
4.区域数据文件(正向)
三.web站点部署
1.配置httpd服务
2.启动Apache服务
3.启动http服务
一.HTTP服务器
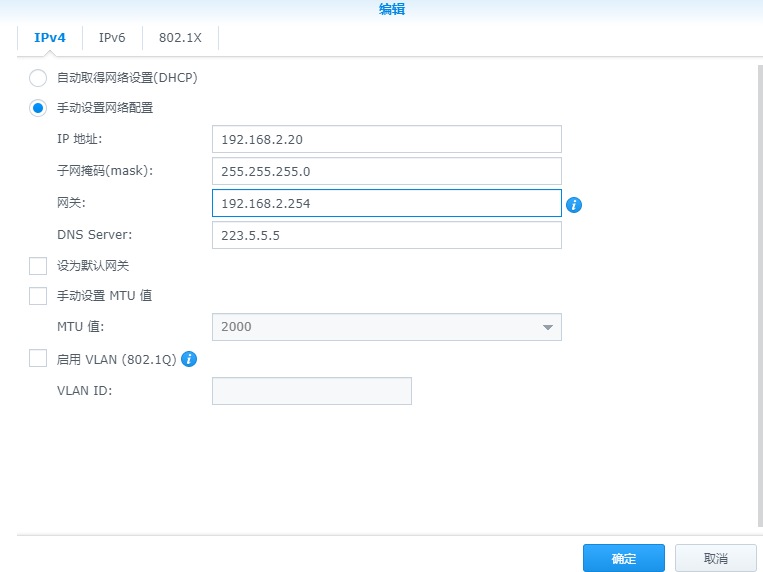
1.配置IP
修改文件:/etc/sysconfig/network-scripts/ifcfg-ens33 BOOTPROTO=static ONBOOT=yes 添加ip地址 IPADDR=192.168.1.10修改文件:/etc/sysconfig/network-scripts/ifcfg-ens33 BOOTPROTO=static ONBOOT=yes 添加ip地址 IPADDR=192.168.1.10修改文件:/etc/sysconfig/network-scripts/ifcfg-ens33 BOOTPROTO=static ONBOOT=yes 添加ip地址 IPADDR=192.168.1.10
重启网络服务
方法一:systemctl restart network 方法二:禁用:ifdown ens33 启用:ifup ens33方法一:systemctl restart network 方法二:禁用:ifdown ens33 启用:ifup ens33方法一:systemctl restart network 方法二:禁用:ifdown ens33 启用:ifup ens33
建议先卸载使用rpm方式安装http。
rpm -e http --nodepsrpm -e http --nodepsrpm -e http --nodeps
挂载光盘1611(先弹出光盘:eject)
mount /dev/cdrom /media cd /media/Packagesmount /dev/cdrom /media cd /media/Packagesmount /dev/cdrom /media cd /media/Packages
2.安装软件开发包
rpm -ivh apr-1.4.8-3.el7.x86_64.rpm rpm -ivh apr-devel-1.4.8-3.el7.x86_64.rpm rpm -ivh cyrus-sasl-devel-2.1.26-20.el7_2.x86_64.rpm rpm -ivh expat-devel-2.1.0-8.el7.x86_64.rpm rpm -ivh libdb-devel-5.3.21-19.el7.x86_64.rpm rpm -ivh openldap-devel-2.4.40-13.el7.x86_64.rpm rpm -ivh apr-util-devel-1.5.2-6.el7.x86_64.rpm rpm -ivh apr-util-1.5.2-6.el7.x86_64.rpm rpm -ivh pcre-devel-8.32-15.el7_2.1.x86_64.rpm rpm -ivh pcre-8.32-15.el7_2.1.x86_64.rpmrpm -ivh apr-1.4.8-3.el7.x86_64.rpm rpm -ivh apr-devel-1.4.8-3.el7.x86_64.rpm rpm -ivh cyrus-sasl-devel-2.1.26-20.el7_2.x86_64.rpm rpm -ivh expat-devel-2.1.0-8.el7.x86_64.rpm rpm -ivh libdb-devel-5.3.21-19.el7.x86_64.rpm rpm -ivh openldap-devel-2.4.40-13.el7.x86_64.rpm rpm -ivh apr-util-devel-1.5.2-6.el7.x86_64.rpm rpm -ivh apr-util-1.5.2-6.el7.x86_64.rpm rpm -ivh pcre-devel-8.32-15.el7_2.1.x86_64.rpm rpm -ivh pcre-8.32-15.el7_2.1.x86_64.rpmrpm -ivh apr-1.4.8-3.el7.x86_64.rpm rpm -ivh apr-devel-1.4.8-3.el7.x86_64.rpm rpm -ivh cyrus-sasl-devel-2.1.26-20.el7_2.x86_64.rpm rpm -ivh expat-devel-2.1.0-8.el7.x86_64.rpm rpm -ivh libdb-devel-5.3.21-19.el7.x86_64.rpm rpm -ivh openldap-devel-2.4.40-13.el7.x86_64.rpm rpm -ivh apr-util-devel-1.5.2-6.el7.x86_64.rpm rpm -ivh apr-util-1.5.2-6.el7.x86_64.rpm rpm -ivh pcre-devel-8.32-15.el7_2.1.x86_64.rpm rpm -ivh pcre-8.32-15.el7_2.1.x86_64.rpm
3.源码编译及安装
插入web光盘(先弹出光盘:eject)
mount /dev/cdrom /media cd /mediamount /dev/cdrom /media cd /mediamount /dev/cdrom /media cd /media
将http源码包解压并释放到/usr/src 目录下
tar zxf httpd-2.4.25.tar.gz -C /usr/src cd /usr/src/httpd-2.4.25tar zxf httpd-2.4.25.tar.gz -C /usr/src cd /usr/src/httpd-2.4.25tar zxf httpd-2.4.25.tar.gz -C /usr/src cd /usr/src/httpd-2.4.25
配置,编译及安装(&&:执行完上一条命令后执行下一条命令,如果上一条命令执行失败将终止继续执行)
./configure --prefix=/usr/local/httpd --enable-os --enable-rewrite --enable-charset-lite --enable-cgi && make && make install./configure --prefix=/usr/local/httpd --enable-os --enable-rewrite --enable-charset-lite --enable-cgi && make && make install./configure --prefix=/usr/local/httpd --enable-os --enable-rewrite --enable-charset-lite --enable-cgi && make && make install

优化路径(优化后,如要查看程序版本直接输入httpd -v便可)
ln -s /usr/local/httpd/bin/* /usr/local/bin ls -l /usr/local/bin/httpd /usr/local/bin/apachectlln -s /usr/local/httpd/bin/* /usr/local/bin ls -l /usr/local/bin/httpd /usr/local/bin/apachectlln -s /usr/local/httpd/bin/* /usr/local/bin ls -l /usr/local/bin/httpd /usr/local/bin/apachectl
4.添加httpd系统服务
cp /usr/local/httpd/bin/apachectl /etc/init.d/httpd vim /etc/init.d/httpdcp /usr/local/httpd/bin/apachectl /etc/init.d/httpd vim /etc/init.d/httpdcp /usr/local/httpd/bin/apachectl /etc/init.d/httpd vim /etc/init.d/httpd
进入/etc/init.d/httpd后输入以下内容:
#!/bin/bash #chkconfig: 35 85 21 //服务识别参数,在级别3,5中启动; //启动和关闭的顺序分别为85,21 #description: Startup script for the Apache HTTP Server //服务描述信息#!/bin/bash #chkconfig: 35 85 21 //服务识别参数,在级别3,5中启动; //启动和关闭的顺序分别为85,21 #description: Startup script for the Apache HTTP Server //服务描述信息#!/bin/bash #chkconfig: 35 85 21 //服务识别参数,在级别3,5中启动; //启动和关闭的顺序分别为85,21 #description: Startup script for the Apache HTTP Server //服务描述信息
将httpd添加为系统服务
chkconfig --add httpdchkconfig --add httpdchkconfig --add httpd
建立[service].service文件

vim /lib/systemd/system/httpd.servicevim /lib/systemd/system/httpd.servicevim /lib/systemd/system/httpd.service
进入/lib/systemd/system/httpd.service后输入以下内容 :
[Unit] Description= aaaaaaaaaaaaaaaa After=network.target [Service] Type=forking PIDFile=/usr/local/httpd/logs/httpd.pid ExecStart=/usr/local/bin/apachectl $OPTIONS ExecReload=/bin/kill -HUP $MAINPID KillMode=process Restart=on-failure RestartSec=42s [Install] WantedBy=graphical.target[Unit] Description= aaaaaaaaaaaaaaaa After=network.target [Service] Type=forking PIDFile=/usr/local/httpd/logs/httpd.pid ExecStart=/usr/local/bin/apachectl $OPTIONS ExecReload=/bin/kill -HUP $MAINPID KillMode=process Restart=on-failure RestartSec=42s [Install] WantedBy=graphical.target[Unit] Description= aaaaaaaaaaaaaaaa After=network.target [Service] Type=forking PIDFile=/usr/local/httpd/logs/httpd.pid ExecStart=/usr/local/bin/apachectl $OPTIONS ExecReload=/bin/kill -HUP $MAINPID KillMode=process Restart=on-failure RestartSec=42s [Install] WantedBy=graphical.target
5.配置httpd服务开机启动
systemctl enable httpd.servicesystemctl enable httpd.servicesystemctl enable httpd.service
查看httpd服务的自启动状态
systemctl is-enabled httpd.servicesystemctl is-enabled httpd.servicesystemctl is-enabled httpd.service
6.启动Apache服务
/usr/local/httpd/bin/apachectl start (启动) /usr/local/httpd/bin/apachectl restart (重启)/usr/local/httpd/bin/apachectl start (启动) /usr/local/httpd/bin/apachectl restart (重启)/usr/local/httpd/bin/apachectl start (启动) /usr/local/httpd/bin/apachectl restart (重启)
二.DNS域名解析
挂载光盘1611(先弹出光盘:eject)
mount /dev/cdrom /media cd /media/Packagesmount /dev/cdrom /media cd /media/Packagesmount /dev/cdrom /media cd /media/Packages
1.安装dns包
rpm -ivh bind-9.9.4-37.el7.x86_64.rpm bind-chroot-9.9.4-37.el7.x86_64.rpmrpm -ivh bind-9.9.4-37.el7.x86_64.rpm bind-chroot-9.9.4-37.el7.x86_64.rpmrpm -ivh bind-9.9.4-37.el7.x86_64.rpm bind-chroot-9.9.4-37.el7.x86_64.rpm
2.主DNS配置
vim /etc/named.confvim /etc/named.confvim /etc/named.conf
进入/etc/named.conf后删除以下内容:
listen-on port 53 {127.0.0.1;}; allow-query {localhost;};listen-on port 53 {127.0.0.1;}; allow-query {localhost;};listen-on port 53 {127.0.0.1;}; allow-query {localhost;};
3.添加benet.com区域
zone "benet.com" in { type master; file "benet.com.zone"; };zone "benet.com" in { type master; file "benet.com.zone"; };zone "benet.com" in { type master; file "benet.com.zone"; };
4.区域数据文件(正向)
vim /var/named/benet.com.zonevim /var/named/benet.com.zonevim /var/named/benet.com.zone
进入/var/named/benet.com.zone后输入以下内容:
$ttl 86400 @ in soa benet.com. admin.benet.com. ( 20050715 3h 15m 1w 1d ) in ns ns1.benet.com. ns1 in a 192.168.1.10 www in a 192.168.1.10$ttl 86400 @ in soa benet.com. admin.benet.com. ( 20050715 3h 15m 1w 1d ) in ns ns1.benet.com. ns1 in a 192.168.1.10 www in a 192.168.1.10$ttl 86400 @ in soa benet.com. admin.benet.com. ( 20050715 3h 15m 1w 1d ) in ns ns1.benet.com. ns1 in a 192.168.1.10 www in a 192.168.1.10
重启服务
systemctl restart namedsystemctl restart namedsystemctl restart named
排查/etc/named.conf文件错误
named-checkconf -z /etc/named.confnamed-checkconf -z /etc/named.confnamed-checkconf -z /etc/named.conf
三.web站点部署
1.配置httpd服务
vim /usr/local/httpd/conf/httpd.confvim /usr/local/httpd/conf/httpd.confvim /usr/local/httpd/conf/httpd.conf
进入/usr/local/httpd/conf/httpd.conf后输入以下内容:
ServerName www.mutou.comServerName www.mutou.comServerName www.mutou.com


2.启动Apache服务
/usr/local/httpd/bin/apachectl start (启动) /usr/local/httpd/bin/apachectl restart (重启)/usr/local/httpd/bin/apachectl start (启动) /usr/local/httpd/bin/apachectl restart (重启)/usr/local/httpd/bin/apachectl start (启动) /usr/local/httpd/bin/apachectl restart (重启)
3.启动http服务
systemctl start httpd netstat -anpt | grep httpdsystemctl start httpd netstat -anpt | grep httpdsystemctl start httpd netstat -anpt | grep httpd
默认80端口

httpd服务器默认提供名为index,html的测试网页(默认显示 It works!)
cat /usr/local/httpd/htdocs/index.htmlcat /usr/local/httpd/htdocs/index.htmlcat /usr/local/httpd/htdocs/index.html

最后使用客户机访问
![]()
原文链接:https://blog.csdn.net/qq_70002958/article/details/124395099


