利用腾讯轻量服务器搭建FRP服务
在如今这个IPV4缺乏的年代,家庭宽带获取到公网IPV4相对比较困难,特别是移动用户,基本上就是默认不给公网IPV4,这时候,如果我们想要把内网的资源映射到公网上去,可能会需要用到内网穿透。而FRP就是提供这种服务的一种工具废话少说,现在开始进入正题。
- 腾讯轻量服务器购买
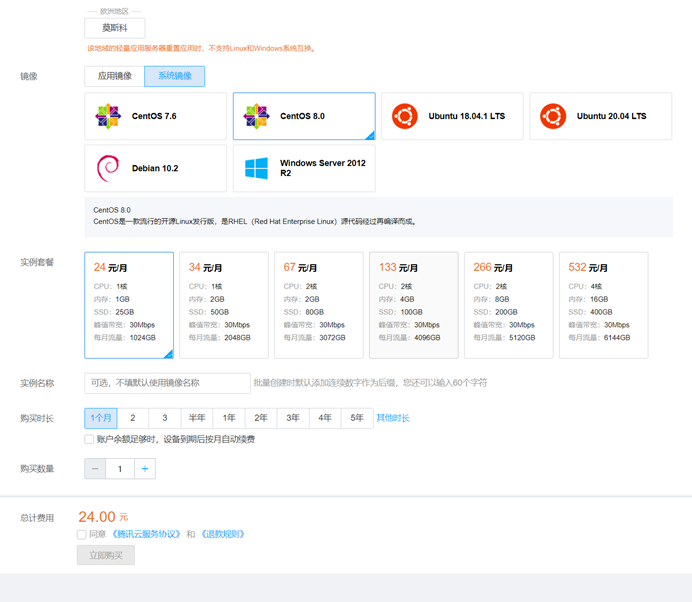
这边我们选择系统镜像,我们以centos8为例。
2. 在腾讯云防火墙开启相应端口(以映射web服务为例,开启80端口,默认已经开启)

-
远程登录服务器,下载源码(以最新版为例)
https://github.com/fatedier/frp/releases/download/v0.35.0/frp_0.35.0_linux_amd64.tar.gz

-
解压并写配置文件
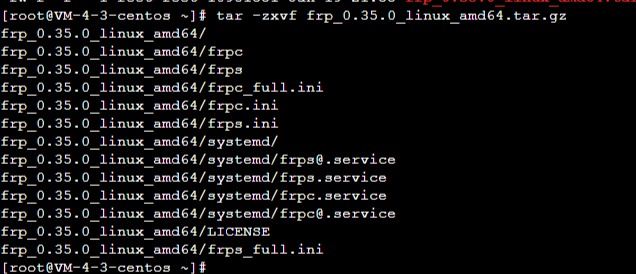
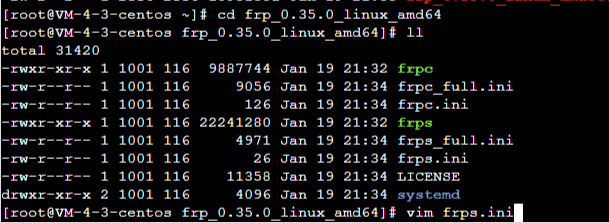
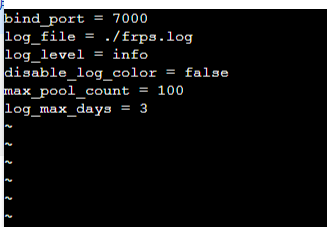
并按照配置要求开放防火墙端口(此处为7000)
5. 设置开机启动
添加systemd配置文件:
vim /usr/lib/systemd/system/frp.service
文件内容如下:
[Unit]
Description=The nginx HTTP and reverse proxy server
After=network.target remote-fs.target nss-lookup.target
[Service]
Type=simple
ExecStart=/usr/local/frp/frps -c /usr/local/frp/frps.ini
KillSignal=SIGQUIT
TimeoutStopSec=5
KillMode=process
PrivateTmp=true
StandardOutput=syslog
StandardError=inherit
[Install]
WantedBy=multi-user.target
ExecStart的内容请根据自己frp安装目录修改。
设置开机启动
systemctl daemon-reload
systemctl enable frp
启动 frp
systemctl start frp
查看frp是否启动
ps aux | grep frps
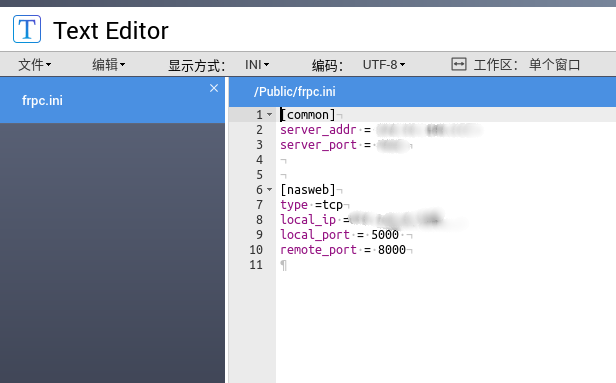
6. 客户端配置
[common]
server_addr = 服务器IP
server_port = 7000
[http]
type = tcp
local_ip = 本机IP
local_port = 80
remote_port = 80
7. 配置完成,尽情享用
原文链接:https://blog.csdn.net/chenxiyu712/article/details/113034220


