实验内容:
使用keepalived监控集群系统中各个服务节点的状态,某节点出现问题可以将服务自动切换到其他节点,从而保证服务的高可用,使用nginx反代后端php-fpm服务器和静态资源服务器,使不同的请求分发到后台不通服务器上,以起到减轻单个服务器压力的作用。
实验环境如图:
所有服务器均采用centos7
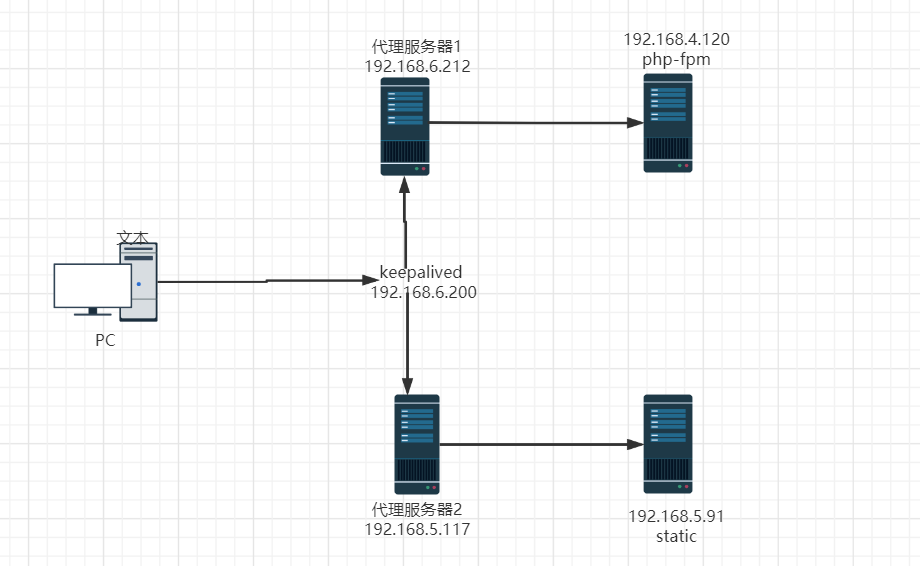
代理1和代理2上安装nginx,php-fpm上安装php
代理1和代理2上:
#下载基本的库文件 yum install pcre pcre-devel zlib zlib-devel openssl openssl-devel -y #配置nginx官方源,下载和安装 rpm -Uvh http://nginx.org/packages/centos/7/noarch/RPMS/nginx-release-centos-7-0.el7.ngx.noarch.rpm #安装nginx yum install nginx -y#下载基本的库文件 yum install pcre pcre-devel zlib zlib-devel openssl openssl-devel -y #配置nginx官方源,下载和安装 rpm -Uvh http://nginx.org/packages/centos/7/noarch/RPMS/nginx-release-centos-7-0.el7.ngx.noarch.rpm #安装nginx yum install nginx -y#下载基本的库文件 yum install pcre pcre-devel zlib zlib-devel openssl openssl-devel -y #配置nginx官方源,下载和安装 rpm -Uvh http://nginx.org/packages/centos/7/noarch/RPMS/nginx-release-centos-7-0.el7.ngx.noarch.rpm #安装nginx yum install nginx -y
php-fpm上
#配置yum源 rpm -Uvh https://dl.fedoraproject.org/pub/epel/epel-release-latest-7.noarch.rpm rpm -Uvh https://mirror.webtatic.com/yum/el7/webtatic-release.rpm #安装php及一些扩展工具 yum install php72w php72w-cli php72w-common php72w-devel php72w-embedded php72w-fpm php72w-gd php72w-mbstring php72w-mysqlnd php72w-opcache php72w-pdo php72w-xml#配置yum源 rpm -Uvh https://dl.fedoraproject.org/pub/epel/epel-release-latest-7.noarch.rpm rpm -Uvh https://mirror.webtatic.com/yum/el7/webtatic-release.rpm #安装php及一些扩展工具 yum install php72w php72w-cli php72w-common php72w-devel php72w-embedded php72w-fpm php72w-gd php72w-mbstring php72w-mysqlnd php72w-opcache php72w-pdo php72w-xml#配置yum源 rpm -Uvh https://dl.fedoraproject.org/pub/epel/epel-release-latest-7.noarch.rpm rpm -Uvh https://mirror.webtatic.com/yum/el7/webtatic-release.rpm #安装php及一些扩展工具 yum install php72w php72w-cli php72w-common php72w-devel php72w-embedded php72w-fpm php72w-gd php72w-mbstring php72w-mysqlnd php72w-opcache php72w-pdo php72w-xml
编辑代理1和代理2上的nginx的配置文件,使其代理后端服务器(此配置文件仅作测试,不能够上生产)
[root@localhost ~]# cat /etc/nginx/conf.d/default.conf upstream fastcgiserver { ##设置后端php-fpm服务器ip及端口 server 192.168.4.120:9000; } upstream static { ##设置后端static服务器ip及端口 server 192.168.5.91; } server { listen 80; server_name 192.168.6.212; #这里在代理2上要换成对应的IP地址 #charset koi8-r; #access_log /var/log/nginx/host.access.log main; location / { root /usr/share/nginx/html; index index.html index.htm; } #error_page 404 /404.html; # redirect server error pages to the static page /50x.html # error_page 500 502 503 504 /50x.html; location = /50x.html { root /usr/share/nginx/html; } location ~ .*\.(jpg|png|css) { #使图片文件交由此location进行处理 root /static; #根目录,这里我放了一张图片2.jpg proxy_pass http://static; #调用上面配置的服务器组 proxy_set_header X-Real-IP $remote_addr; } location ~ \.php$ { #使php文件交由此location进行处理 root /www; #根目录 #fastcgi_pass 127.0.0.1:9000; fastcgi_pass fastcgiserver; #调用上面的服务器组 fastcgi_index index.php; fastcgi_param SCRIPT_FILENAME $document_root$fastcgi_script_name; include fastcgi_params; } # proxy the PHP scripts to Apache listening on 127.0.0.1:80 # #location ~ \.php$ { # proxy_pass http://127.0.0.1; #} # pass the PHP scripts to FastCGI server listening on 127.0.0.1:9000 # #location ~ \.php$ { # root html; # fastcgi_pass 127.0.0.1:9000; # fastcgi_index index.php; # fastcgi_param SCRIPT_FILENAME /scripts$fastcgi_script_name; # include fastcgi_params; #} # deny access to .htaccess files, if Apache's document root # concurs with nginx's one # #location ~ /\.ht { # deny all; #} }[root@localhost ~]# cat /etc/nginx/conf.d/default.conf upstream fastcgiserver { ##设置后端php-fpm服务器ip及端口 server 192.168.4.120:9000; } upstream static { ##设置后端static服务器ip及端口 server 192.168.5.91; } server { listen 80; server_name 192.168.6.212; #这里在代理2上要换成对应的IP地址 #charset koi8-r; #access_log /var/log/nginx/host.access.log main; location / { root /usr/share/nginx/html; index index.html index.htm; } #error_page 404 /404.html; # redirect server error pages to the static page /50x.html # error_page 500 502 503 504 /50x.html; location = /50x.html { root /usr/share/nginx/html; } location ~ .*\.(jpg|png|css) { #使图片文件交由此location进行处理 root /static; #根目录,这里我放了一张图片2.jpg proxy_pass http://static; #调用上面配置的服务器组 proxy_set_header X-Real-IP $remote_addr; } location ~ \.php$ { #使php文件交由此location进行处理 root /www; #根目录 #fastcgi_pass 127.0.0.1:9000; fastcgi_pass fastcgiserver; #调用上面的服务器组 fastcgi_index index.php; fastcgi_param SCRIPT_FILENAME $document_root$fastcgi_script_name; include fastcgi_params; } # proxy the PHP scripts to Apache listening on 127.0.0.1:80 # #location ~ \.php$ { # proxy_pass http://127.0.0.1; #} # pass the PHP scripts to FastCGI server listening on 127.0.0.1:9000 # #location ~ \.php$ { # root html; # fastcgi_pass 127.0.0.1:9000; # fastcgi_index index.php; # fastcgi_param SCRIPT_FILENAME /scripts$fastcgi_script_name; # include fastcgi_params; #} # deny access to .htaccess files, if Apache's document root # concurs with nginx's one # #location ~ /\.ht { # deny all; #} }[root@localhost ~]# cat /etc/nginx/conf.d/default.conf upstream fastcgiserver { ##设置后端php-fpm服务器ip及端口 server 192.168.4.120:9000; } upstream static { ##设置后端static服务器ip及端口 server 192.168.5.91; } server { listen 80; server_name 192.168.6.212; #这里在代理2上要换成对应的IP地址 #charset koi8-r; #access_log /var/log/nginx/host.access.log main; location / { root /usr/share/nginx/html; index index.html index.htm; } #error_page 404 /404.html; # redirect server error pages to the static page /50x.html # error_page 500 502 503 504 /50x.html; location = /50x.html { root /usr/share/nginx/html; } location ~ .*\.(jpg|png|css) { #使图片文件交由此location进行处理 root /static; #根目录,这里我放了一张图片2.jpg proxy_pass http://static; #调用上面配置的服务器组 proxy_set_header X-Real-IP $remote_addr; } location ~ \.php$ { #使php文件交由此location进行处理 root /www; #根目录 #fastcgi_pass 127.0.0.1:9000; fastcgi_pass fastcgiserver; #调用上面的服务器组 fastcgi_index index.php; fastcgi_param SCRIPT_FILENAME $document_root$fastcgi_script_name; include fastcgi_params; } # proxy the PHP scripts to Apache listening on 127.0.0.1:80 # #location ~ \.php$ { # proxy_pass http://127.0.0.1; #} # pass the PHP scripts to FastCGI server listening on 127.0.0.1:9000 # #location ~ \.php$ { # root html; # fastcgi_pass 127.0.0.1:9000; # fastcgi_index index.php; # fastcgi_param SCRIPT_FILENAME /scripts$fastcgi_script_name; # include fastcgi_params; #} # deny access to .htaccess files, if Apache's document root # concurs with nginx's one # #location ~ /\.ht { # deny all; #} }
配置php-fpm
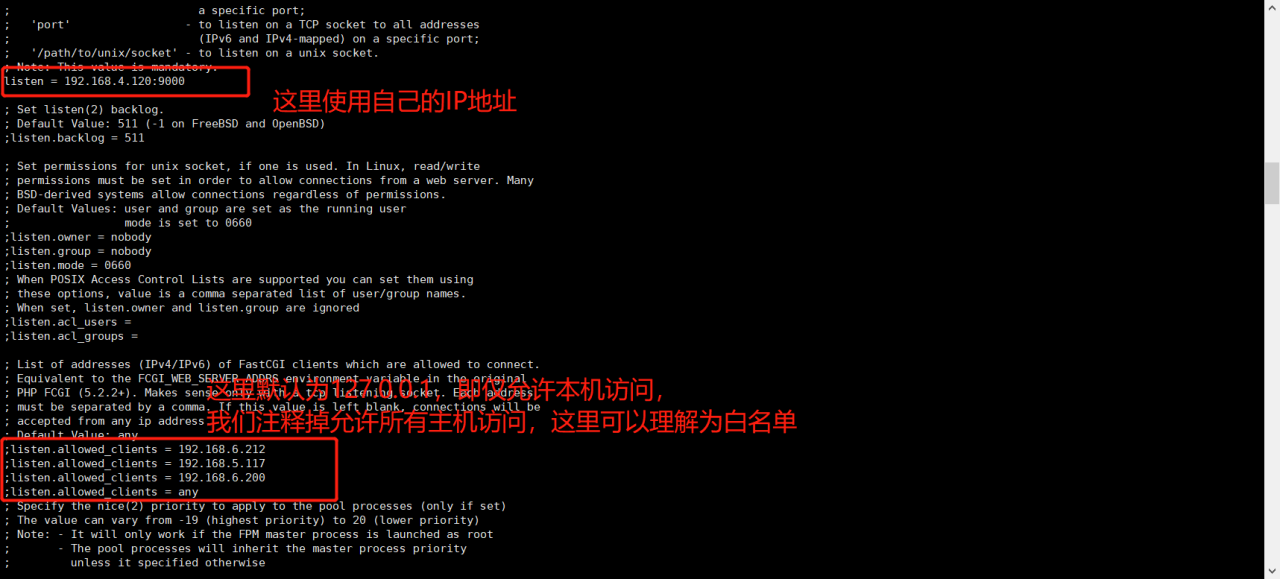
我在php-fpm上/www下放了一个名字为index.php的文件,内容如下
[root@localhost ~]# cat /www/index.php <?php echo "server01"; phpinfo() ?>[root@localhost ~]# cat /www/index.php <?php echo "server01"; phpinfo() ?>[root@localhost ~]# cat /www/index.php <?php echo "server01"; phpinfo() ?>
static上安装nginx
#下载基本的库文件 yum install pcre pcre-devel zlib zlib-devel openssl openssl-devel -y #配置nginx官方源,下载和安装 rpm -Uvh http://nginx.org/packages/centos/7/noarch/RPMS/nginx-release-centos-7-0.el7.ngx.noarch.rpm #安装nginx yum install nginx -y systemctl start nginx systemctl enable nginx#下载基本的库文件 yum install pcre pcre-devel zlib zlib-devel openssl openssl-devel -y #配置nginx官方源,下载和安装 rpm -Uvh http://nginx.org/packages/centos/7/noarch/RPMS/nginx-release-centos-7-0.el7.ngx.noarch.rpm #安装nginx yum install nginx -y systemctl start nginx systemctl enable nginx#下载基本的库文件 yum install pcre pcre-devel zlib zlib-devel openssl openssl-devel -y #配置nginx官方源,下载和安装 rpm -Uvh http://nginx.org/packages/centos/7/noarch/RPMS/nginx-release-centos-7-0.el7.ngx.noarch.rpm #安装nginx yum install nginx -y systemctl start nginx systemctl enable nginx
到这里,代理的配置已经完成了,我们启动nginx和php-fpm
systemctl start nginx systemctl enable nginx systemctl start php-fpm systemctl enable php-fpmsystemctl start nginx systemctl enable nginx systemctl start php-fpm systemctl enable php-fpmsystemctl start nginx systemctl enable nginx systemctl start php-fpm systemctl enable php-fpm
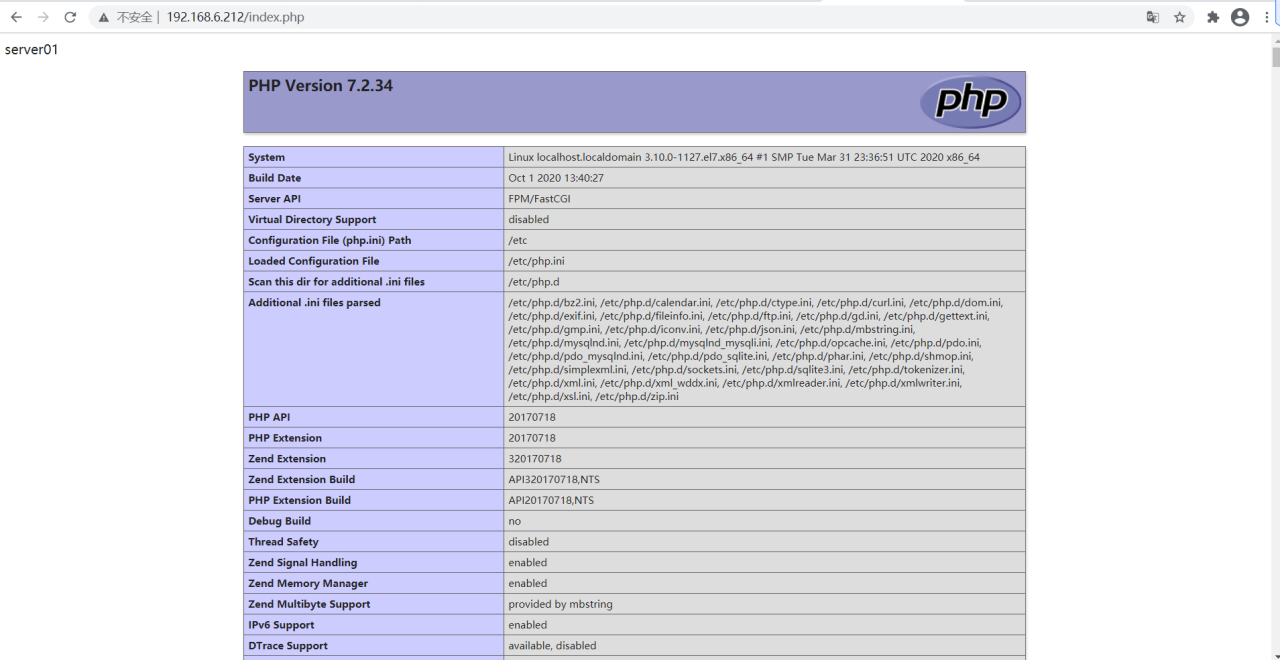
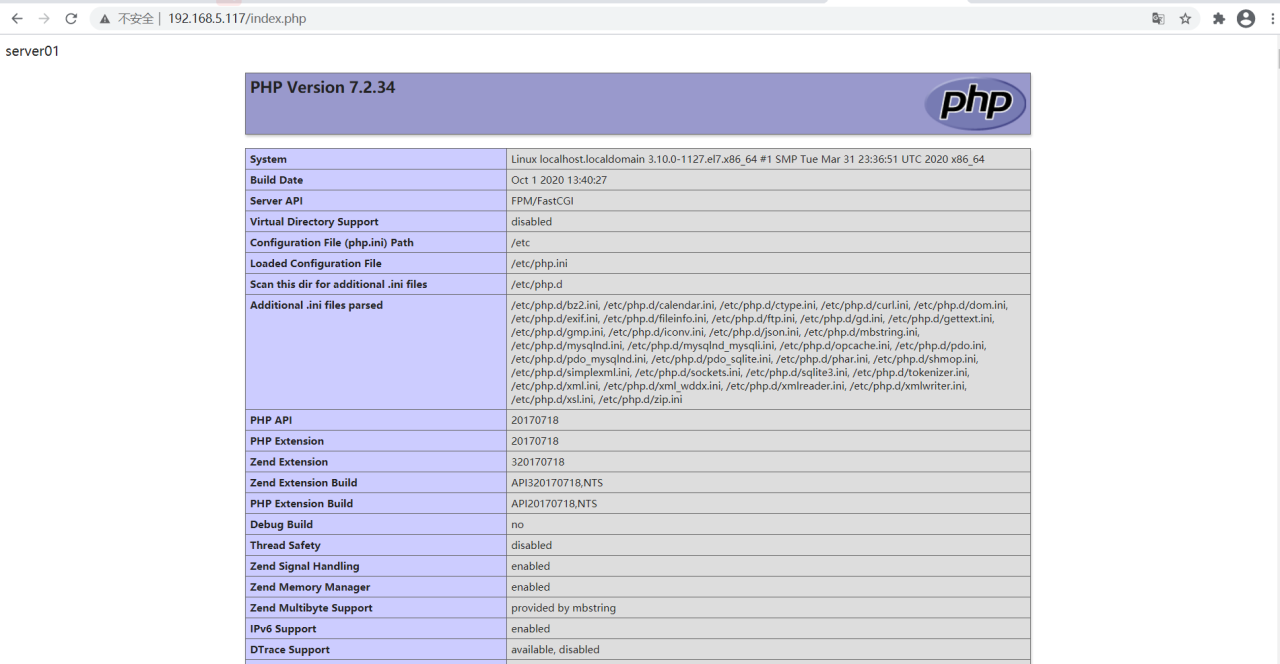
访问代理1和代理2测试


安装配置keepalived实现高可用
代理1和代理2均安装,但是配置文件主备稍有不同,具体看以下配置文件注释
#安装 yum install -y keepalived #修改配置文件 [root@localhost ~]# cat /etc/keepalived/keepalived.conf ! Configuration File for keepalived global_defs { notification_email { acassen@firewall.loc failover@firewall.loc sysadmin@firewall.loc } notification_email_from Alexandre.Cassen@firewall.loc smtp_server 192.168.200.1 smtp_connect_timeout 30 router_id nginx_master #同一个网络中要保持唯一 script_user root #默认没有需要加上否则会报找不到用户执行脚本的错误 enable_script_security #默认没有需要加上 vrrp_skip_check_adv_addr #vrrp_strict #注释掉,否则会自动配置防火墙导致虚拟ip无法访问 vrrp_garp_interval 0 vrrp_gna_interval 0 } vrrp_script chk_http_port { #配置调用脚本 script "/shell/nginx_check.sh" #脚本路径,脚本内容及用途请往后看 interval 2 weight 2 } vrrp_instance VI_1 { state MASTER #这里为主,备的上面设置为BACKUP interface ens32 #根据实际网卡进行修改 virtual_router_id 51 priority 100 #备要比主低 advert_int 1 authentication { auth_type PASS auth_pass 1111 } virtual_ipaddress { 192.168.6.200 #虚拟IP主备保持一致 } track_script { #调用上面的脚本配置 chk_http_port } } virtual_server 192.168.200.100 443 { delay_loop 6 lb_algo rr lb_kind NAT persistence_timeout 50 protocol TCP real_server 192.168.201.100 443 { weight 1 SSL_GET { url { path / digest ff20ad2481f97b1754ef3e12ecd3a9cc } url { path /mrtg/ digest 9b3a0c85a887a256d6939da88aabd8cd } connect_timeout 3 nb_get_retry 3 delay_before_retry 3 } } } virtual_server 10.10.10.2 1358 { delay_loop 6 lb_algo rr lb_kind NAT persistence_timeout 50 protocol TCP sorry_server 192.168.200.200 1358 real_server 192.168.200.2 1358 { weight 1 HTTP_GET { url { path /testurl/test.jsp digest 640205b7b0fc66c1ea91c463fac6334d } url { path /testurl2/test.jsp digest 640205b7b0fc66c1ea91c463fac6334d } url { path /testurl3/test.jsp digest 640205b7b0fc66c1ea91c463fac6334d } connect_timeout 3 nb_get_retry 3 delay_before_retry 3 } } real_server 192.168.200.3 1358 { weight 1 HTTP_GET { url { path /testurl/test.jsp digest 640205b7b0fc66c1ea91c463fac6334c } url { path /testurl2/test.jsp digest 640205b7b0fc66c1ea91c463fac6334c } connect_timeout 3 nb_get_retry 3 delay_before_retry 3 } } } virtual_server 10.10.10.3 1358 { delay_loop 3 lb_algo rr lb_kind NAT persistence_timeout 50 protocol TCP real_server 192.168.200.4 1358 { weight 1 HTTP_GET { url { path /testurl/test.jsp digest 640205b7b0fc66c1ea91c463fac6334d } url { path /testurl2/test.jsp digest 640205b7b0fc66c1ea91c463fac6334d } url { path /testurl3/test.jsp digest 640205b7b0fc66c1ea91c463fac6334d } connect_timeout 3 nb_get_retry 3 delay_before_retry 3 } } real_server 192.168.200.5 1358 { weight 1 HTTP_GET { url { path /testurl/test.jsp digest 640205b7b0fc66c1ea91c463fac6334d } url { path /testurl2/test.jsp digest 640205b7b0fc66c1ea91c463fac6334d } url { path /testurl3/test.jsp digest 640205b7b0fc66c1ea91c463fac6334d } connect_timeout 3 nb_get_retry 3 delay_before_retry 3 } } } #启动 systemctl start keepalived.service#安装 yum install -y keepalived #修改配置文件 [root@localhost ~]# cat /etc/keepalived/keepalived.conf ! Configuration File for keepalived global_defs { notification_email { acassen@firewall.loc failover@firewall.loc sysadmin@firewall.loc } notification_email_from Alexandre.Cassen@firewall.loc smtp_server 192.168.200.1 smtp_connect_timeout 30 router_id nginx_master #同一个网络中要保持唯一 script_user root #默认没有需要加上否则会报找不到用户执行脚本的错误 enable_script_security #默认没有需要加上 vrrp_skip_check_adv_addr #vrrp_strict #注释掉,否则会自动配置防火墙导致虚拟ip无法访问 vrrp_garp_interval 0 vrrp_gna_interval 0 } vrrp_script chk_http_port { #配置调用脚本 script "/shell/nginx_check.sh" #脚本路径,脚本内容及用途请往后看 interval 2 weight 2 } vrrp_instance VI_1 { state MASTER #这里为主,备的上面设置为BACKUP interface ens32 #根据实际网卡进行修改 virtual_router_id 51 priority 100 #备要比主低 advert_int 1 authentication { auth_type PASS auth_pass 1111 } virtual_ipaddress { 192.168.6.200 #虚拟IP主备保持一致 } track_script { #调用上面的脚本配置 chk_http_port } } virtual_server 192.168.200.100 443 { delay_loop 6 lb_algo rr lb_kind NAT persistence_timeout 50 protocol TCP real_server 192.168.201.100 443 { weight 1 SSL_GET { url { path / digest ff20ad2481f97b1754ef3e12ecd3a9cc } url { path /mrtg/ digest 9b3a0c85a887a256d6939da88aabd8cd } connect_timeout 3 nb_get_retry 3 delay_before_retry 3 } } } virtual_server 10.10.10.2 1358 { delay_loop 6 lb_algo rr lb_kind NAT persistence_timeout 50 protocol TCP sorry_server 192.168.200.200 1358 real_server 192.168.200.2 1358 { weight 1 HTTP_GET { url { path /testurl/test.jsp digest 640205b7b0fc66c1ea91c463fac6334d } url { path /testurl2/test.jsp digest 640205b7b0fc66c1ea91c463fac6334d } url { path /testurl3/test.jsp digest 640205b7b0fc66c1ea91c463fac6334d } connect_timeout 3 nb_get_retry 3 delay_before_retry 3 } } real_server 192.168.200.3 1358 { weight 1 HTTP_GET { url { path /testurl/test.jsp digest 640205b7b0fc66c1ea91c463fac6334c } url { path /testurl2/test.jsp digest 640205b7b0fc66c1ea91c463fac6334c } connect_timeout 3 nb_get_retry 3 delay_before_retry 3 } } } virtual_server 10.10.10.3 1358 { delay_loop 3 lb_algo rr lb_kind NAT persistence_timeout 50 protocol TCP real_server 192.168.200.4 1358 { weight 1 HTTP_GET { url { path /testurl/test.jsp digest 640205b7b0fc66c1ea91c463fac6334d } url { path /testurl2/test.jsp digest 640205b7b0fc66c1ea91c463fac6334d } url { path /testurl3/test.jsp digest 640205b7b0fc66c1ea91c463fac6334d } connect_timeout 3 nb_get_retry 3 delay_before_retry 3 } } real_server 192.168.200.5 1358 { weight 1 HTTP_GET { url { path /testurl/test.jsp digest 640205b7b0fc66c1ea91c463fac6334d } url { path /testurl2/test.jsp digest 640205b7b0fc66c1ea91c463fac6334d } url { path /testurl3/test.jsp digest 640205b7b0fc66c1ea91c463fac6334d } connect_timeout 3 nb_get_retry 3 delay_before_retry 3 } } } #启动 systemctl start keepalived.service#安装 yum install -y keepalived #修改配置文件 [root@localhost ~]# cat /etc/keepalived/keepalived.conf ! Configuration File for keepalived global_defs { notification_email { acassen@firewall.loc failover@firewall.loc sysadmin@firewall.loc } notification_email_from Alexandre.Cassen@firewall.loc smtp_server 192.168.200.1 smtp_connect_timeout 30 router_id nginx_master #同一个网络中要保持唯一 script_user root #默认没有需要加上否则会报找不到用户执行脚本的错误 enable_script_security #默认没有需要加上 vrrp_skip_check_adv_addr #vrrp_strict #注释掉,否则会自动配置防火墙导致虚拟ip无法访问 vrrp_garp_interval 0 vrrp_gna_interval 0 } vrrp_script chk_http_port { #配置调用脚本 script "/shell/nginx_check.sh" #脚本路径,脚本内容及用途请往后看 interval 2 weight 2 } vrrp_instance VI_1 { state MASTER #这里为主,备的上面设置为BACKUP interface ens32 #根据实际网卡进行修改 virtual_router_id 51 priority 100 #备要比主低 advert_int 1 authentication { auth_type PASS auth_pass 1111 } virtual_ipaddress { 192.168.6.200 #虚拟IP主备保持一致 } track_script { #调用上面的脚本配置 chk_http_port } } virtual_server 192.168.200.100 443 { delay_loop 6 lb_algo rr lb_kind NAT persistence_timeout 50 protocol TCP real_server 192.168.201.100 443 { weight 1 SSL_GET { url { path / digest ff20ad2481f97b1754ef3e12ecd3a9cc } url { path /mrtg/ digest 9b3a0c85a887a256d6939da88aabd8cd } connect_timeout 3 nb_get_retry 3 delay_before_retry 3 } } } virtual_server 10.10.10.2 1358 { delay_loop 6 lb_algo rr lb_kind NAT persistence_timeout 50 protocol TCP sorry_server 192.168.200.200 1358 real_server 192.168.200.2 1358 { weight 1 HTTP_GET { url { path /testurl/test.jsp digest 640205b7b0fc66c1ea91c463fac6334d } url { path /testurl2/test.jsp digest 640205b7b0fc66c1ea91c463fac6334d } url { path /testurl3/test.jsp digest 640205b7b0fc66c1ea91c463fac6334d } connect_timeout 3 nb_get_retry 3 delay_before_retry 3 } } real_server 192.168.200.3 1358 { weight 1 HTTP_GET { url { path /testurl/test.jsp digest 640205b7b0fc66c1ea91c463fac6334c } url { path /testurl2/test.jsp digest 640205b7b0fc66c1ea91c463fac6334c } connect_timeout 3 nb_get_retry 3 delay_before_retry 3 } } } virtual_server 10.10.10.3 1358 { delay_loop 3 lb_algo rr lb_kind NAT persistence_timeout 50 protocol TCP real_server 192.168.200.4 1358 { weight 1 HTTP_GET { url { path /testurl/test.jsp digest 640205b7b0fc66c1ea91c463fac6334d } url { path /testurl2/test.jsp digest 640205b7b0fc66c1ea91c463fac6334d } url { path /testurl3/test.jsp digest 640205b7b0fc66c1ea91c463fac6334d } connect_timeout 3 nb_get_retry 3 delay_before_retry 3 } } real_server 192.168.200.5 1358 { weight 1 HTTP_GET { url { path /testurl/test.jsp digest 640205b7b0fc66c1ea91c463fac6334d } url { path /testurl2/test.jsp digest 640205b7b0fc66c1ea91c463fac6334d } url { path /testurl3/test.jsp digest 640205b7b0fc66c1ea91c463fac6334d } connect_timeout 3 nb_get_retry 3 delay_before_retry 3 } } } #启动 systemctl start keepalived.service
有时候会出现一种情况,nginx挂掉了但是keeplivedm没挂,那么我们就需要一个脚本来检测nginx是否挂掉,nginx挂掉后要重新启动,无法启动要停掉keeplived启用另外一个节点,
脚本内容如下
[root@localhost ~]# cat /shell/nginx_check.sh #!/bin/bash echo 'nginx是否挂掉' count_nginx=`ps -ef|grep -w nginx|grep -v grep|wc -l` echo $count_nginx if [ $count_nginx -eq 0 ];then systemctl start nginx sleep 2 if [ `ps -ef|grep -w nginx|grep -v grep|wc -l` ];then systemctl stop keepalived.service fi fi[root@localhost ~]# cat /shell/nginx_check.sh #!/bin/bash echo 'nginx是否挂掉' count_nginx=`ps -ef|grep -w nginx|grep -v grep|wc -l` echo $count_nginx if [ $count_nginx -eq 0 ];then systemctl start nginx sleep 2 if [ `ps -ef|grep -w nginx|grep -v grep|wc -l` ];then systemctl stop keepalived.service fi fi[root@localhost ~]# cat /shell/nginx_check.sh #!/bin/bash echo 'nginx是否挂掉' count_nginx=`ps -ef|grep -w nginx|grep -v grep|wc -l` echo $count_nginx if [ $count_nginx -eq 0 ];then systemctl start nginx sleep 2 if [ `ps -ef|grep -w nginx|grep -v grep|wc -l` ];then systemctl stop keepalived.service fi fi
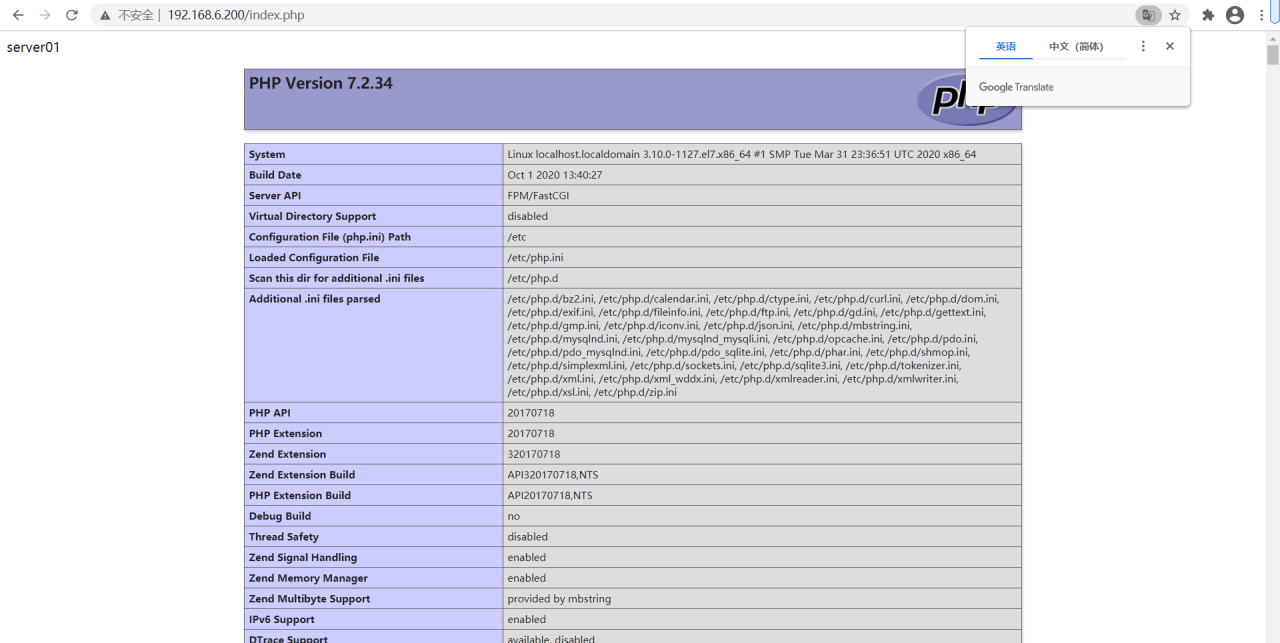
访问虚拟IP进行测试

现在我们停掉代理1服务器的nginx,和直接让代理1服务器死掉,我们来看这两种情况
停掉代理1的nginx,按照我们脚本内容应该自动重启

可以看到我停掉nginx会检测到直接重启,这种情况没问题
下面我直接关机代理1,我们看到代理2上出现了虚拟ip说明我们配置的keeplived生效了

在这种情况下我们访问虚拟IP发现网站仍是正常的
—————————-此文章为基本的知识点测试,仅为学习记录所用————————————————————
原文链接:https://blog.csdn.net/zhangsaho/article/details/115669922



![深信服SCSA认证知识点(2)[通俗易懂]-陌上烟雨遥](https://wallpaper.moluyao.wang/wp-content/uploads/2024/06/QQ截图20240604170035.png)

