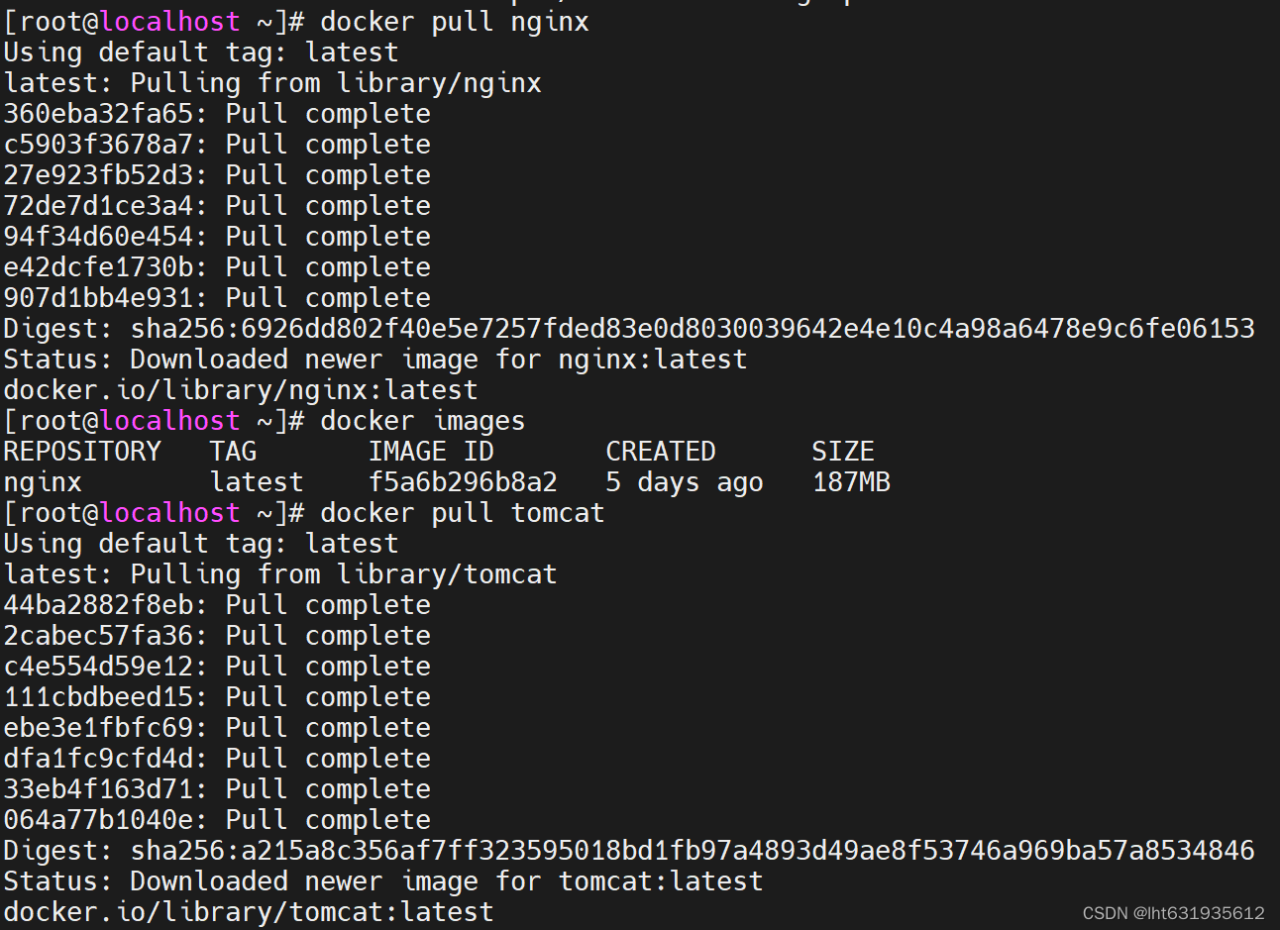
1.在Docker中拉取sulinggg/openwrt:x86_64的镜像
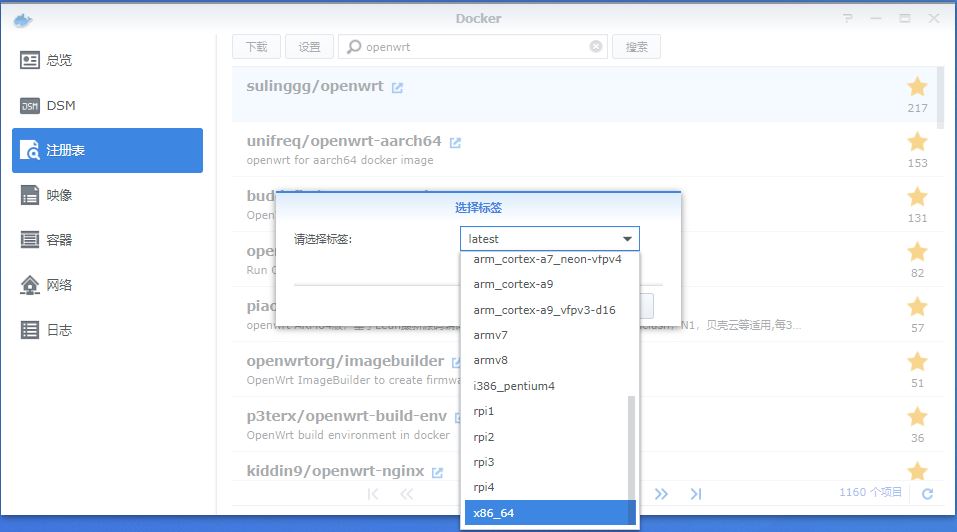
2.使用群晖的管理账号SSH登陆群晖系统,使用命令获得root账号权限
login as: xxx xxx@192.168.166.xx's password: xzd@xzdcloud:/$ sudo -i #临时获得root权限 Password: #输入管理员密码 root@xzdcloud:~ # cd /etc/ssh/ root@xzdcloud: /etc/ssh # chmod 755 sshd_config root@xzdcloud: /etc/ssh # vi sshd_config #按一下电脑键盘上的I键或者Insert键,屏幕左下角出现“--Insert--”字样,进入可编辑状态 #LoginGraceTime 2m #PermitRootLogin prohibit-password #查找这一行,将前面#号去掉,并改为PermitRootLogin yes,随后ESC退出编辑模式,按Shift+冒号,输入wq保存退出 #StrictModes yes #MaxAuthTries 6 #MaxSessions 10 重启主机后再次SSH登陆 xzd@xzdcloud:/$ sudo -i Password: root@xzdcloud:~ # synouser --setpw root King709394# #--setpw设置root用户的密码为King70939#
3.使用root账户把网卡设置为混杂模式
root@xzdcloud:~ # ip link set ovs_eth0 promisc on
4.在docker中创建一个名为ipv6-lan的ipv4&ipv6虚拟网卡
root@xzdcloud:~ # docker network create -d macvlan -o parent=ovs_eth0 ipv6-lan --subnet=192.168.166.0/24 --gateway=192.168.166.1 --ipv6 --subnet=240e:330:817:4b00::/56 --gateway=240e:330:817:4b00::1 #subnet设置网段,gateway设置网关
5.创建好网卡以后就可以使用下载好的镜像创建名为openwrt的容器了
root@xzdcloud:~ # docker run -d \ > --restart always \ #自动重启 > --network ipv6-lan \ #设置网卡为刚才创建的虚拟网卡 > --ip 192.168.166.254 \ #openwrt的管理地址 > --privileged \ > --name openwrt \ #设置容器名为openwrt > sulinggg /openwrt :x86_64 /sbin/init #使用镜像前面拉取的镜像 sulinggg/openwrt:x86_64
6.使用docker ps -a查看创建的容器状态,up为正常
root@xzdcloud:~ # docker ps -a CONTAINER ID IMAGE COMMAND CREATED STATUS PORTS NAMES 407f1f3231be sulinggg /openwrt :x86_64 "/sbin/init" 3 minutes ago Up 3 minutes openwrt 3bb6a92ad458 adguard /adguardhome :latest "/opt/adguardhome/..." 5 days ago Up 5 days adguard-adguardhome1
7.登陆到openwrt容器中修改lan的网络配置
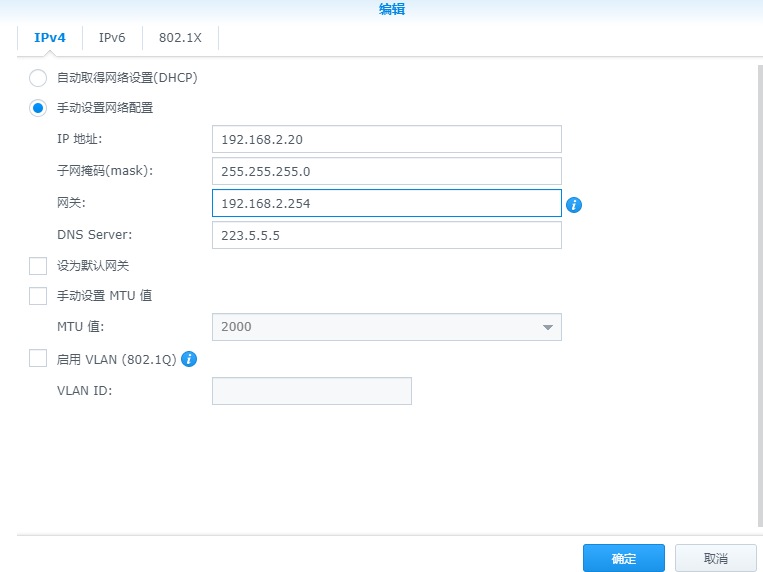
root@xzdcloud:~ # docker exec -it openwrt bash #登陆到创建的容器,openwrt为创建的容器名 bash -5.1 # vi /etc/config/network #修改网络配置 config interface 'loopback' option ifname 'lo' option proto 'static' option ipaddr '127.0.0.1' option netmask '255.0.0.0' config globals 'globals' option packet_steering '1' config interface 'lan' option type 'bridge' option ifname 'eth0' option proto 'static' option netmask '255.255.255.0' option ip6assign '60' option ipaddr 'xxx.xxx.xxx.xxx' #设置为openwrt管理地址 option gateway 'xxx.xxx.xxx.xxx' #设置网关 option broadcast 'xxx.xxx.xxx.xxx' #设置广播地址,可不用这一行 option dns 'xxx.xxx.xxx.xxx' #设置DNS为网关 config interface 'vpn0' option ifname 'tun0' option proto 'none' bash -5.1 # /etc/init.d/network restart #重启网络服务
8.登陆openwrt管理地址,设置网络=》接口=》Lan配置中勾选最下面的“忽略此接口”并保存(新版本已默认勾选)
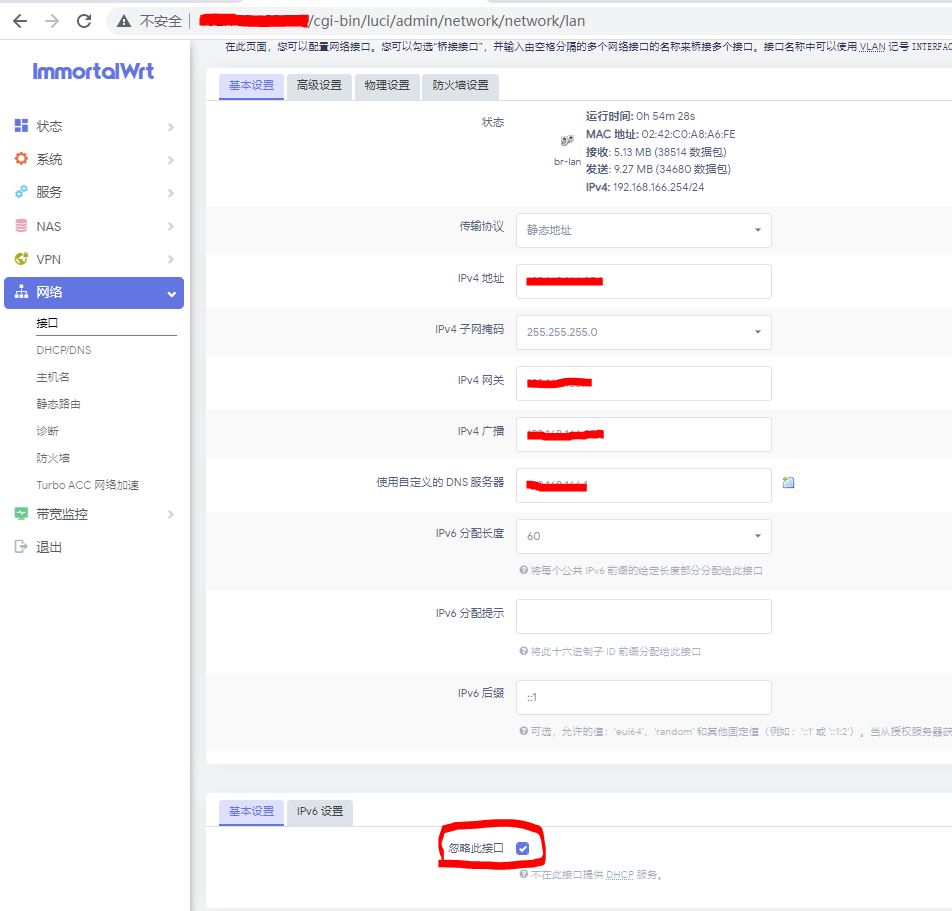
9.把电脑(不是群晖的)的网关和DNS设置为openwrt的管理地址,如果不能上网,需要更改网络=》防火墙=》常规设置中把“转发”的选项改为“接受”

10.如果还不行,再进入网络=》防火墙=》自定义规则中注释规则“iptables -t nat -I POSTROUTING -j MASQUERADE”并添加规则“iptables -I FORWARD -j ACCEPT”“iptables -I INPUT -j ACCEPT”试试

原文链接:https://www.cnblogs.com/ippondo/p/16878986.html
© 版权声明
声明📢本站内容均来自互联网,归原创作者所有,如有侵权必删除。
本站文章皆由CC-4.0协议发布,如无来源则为原创,转载请注明出处。
THE END


