来源于Github:https://github.com/qbittorrent/qBittorrent/wiki/Compiling-qBittorrent-on-Debian-and-Ubuntu
直接进入正题吧!需要以root用户登录!
一、安装依赖环境
①安装一般依赖包
apt-get install libboost-dev libboost-system-dev build-essential apt-get install libboost-chrono-dev libboost-random-dev libssl-dev libgeoip-dev apt-get install git pkg-config automake libtool
②安装Qt5库
apt-get install qtbase5-dev qttools5-dev-tools
③安装python和GeoIP数据库
apt-get install python apt-get install geoip-database
二、安装Libtorrent
①下载Libtorrent包并打开
git clone https://github.com/arvidn/libtorrent.git cd libtorrent
②选择1.0.*分支编译安装
git checkout RC_1_0 ./autotool.sh ./configure --disable-debug --enable-encryption --prefix=/usr --with-libgeoip=system make clean && make make install
三、编辑安装qBittorrent
①从github下载对应版本的QB安装包
QB历史版本下载:https://github.com/qbittorrent/qBittorrent/releases
如编译安装3.3.11版本的QB
wget https://github.com/qbittorrent/qBittorrent/archive/release-3.3.11.tar.gz tar -xzvf release-3.3.11.tar.gz cd qBittorrent-release-3.3.11
②编译qBittorrent
./configure --prefix=/usr --disable-gui make && make install
这里编译的时候如果提示错误 缺少 zlib 运行以下命令即可
apt-get install zlib1g-dev
四、运行qBittorrent
①初始化QB(设置中文)
运行以下命令
qbittorrent-nox
运行后会提示输入,输入y,然后回车即可,这时打开第③步中的地址,进入后打开设置,在WEBUI里将语言改成中文,然后Ctrl+C 结束,再次输入命令运行QB,这是刷新网页就是中文了,意思就是设置完需要重启下客户端才能使语言修改生效,其它设置类似。
②在后台运行qBittorrent
因为直接运行QB,退出shell窗口的话就会关闭,所以我们可以用nohup的方式运行QB
nohup qbittorrent-nox &
这样QB就已经稳定在后台运行了,即使你关闭shell也不会结束的。
③访问qBittorrent的Web-UI
默认地址: http://IP地址:8080 默认用户名: admin 默认密码: adminadmin
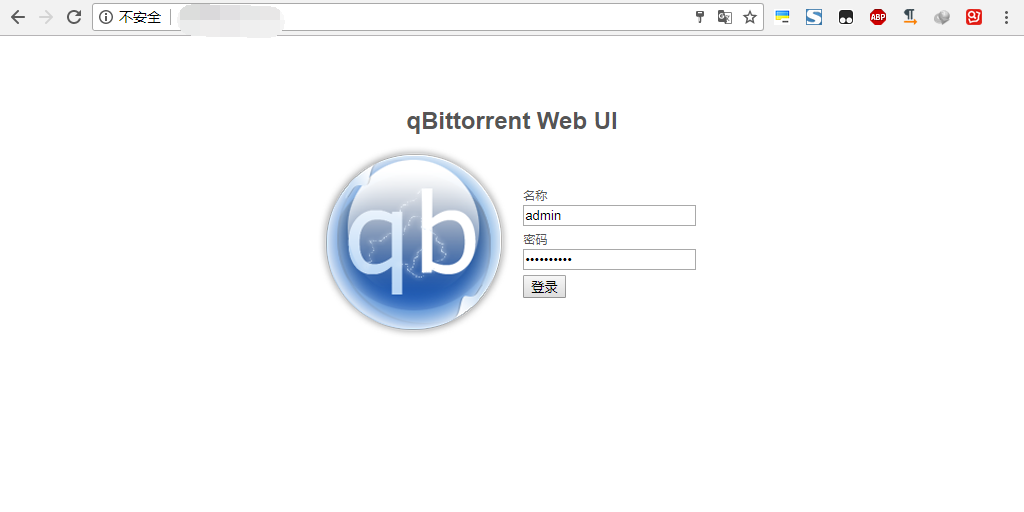
记住需要开放防火墙的8080端口和qBittorrent的连接端口(默认8999好像)额,可以在选项中设置!!
有问题留言,会再补充!
原文链接:https://www.cnblogs.com/shuochen/p/8533712.html
© 版权声明
声明📢本站内容均来自互联网,归原创作者所有,如有侵权必删除。
本站文章皆由CC-4.0协议发布,如无来源则为原创,转载请注明出处。
THE END


